Creating a handout in InDesign
- Open InDesign and select File>New>Document
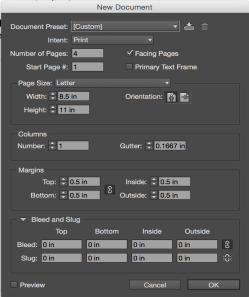
2. Enter the number of pages your document will be and select the paper size. If your document requires it, you may need to adjust other settings also. For this demo, we will need 2 pages and use standard 8.5 x 11 for the paper size. Start page number should be 2. Press "OK".
3. Your blank document should look like this

4. Click and drag from the top left corner where the horizontal and vertical rulers intersect. You can also click, hold, and drag from the rulers themselves to create horizontal or vertical measurements and markers. On page one drag a line from the horizontal ruler (top) 1.5 inches down and from the vertical ruler to the 4 1/4 " marking on the top ruler. These will be used to help center the title.

5. Use the text tool ![]() and draw a text box
and draw a text box
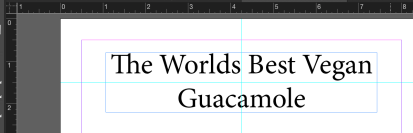
6. Type your title in the text box and adjust the font and text sizes. You may need to expand the size of the box for large font and text sizes. Adjust the corners of the text box so that there is not too much extra room in the box around the text. When moving the box around, a blue vertical line will appear through the document when the box is centered. The bottom of the box should rest on the horizontal line we created.
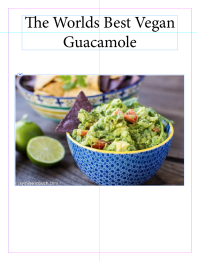
7. Next we will add an image. To do so, drag an image in from your desktop or finder window. You can also go to File>Place and navigate to the image(s) location. I am using guac.jpg for this demo. Put the image in the center of the first page. When the image is centered you will see a blue horizontal and blue vertical lines going across the image and the page. Adjust the size of the image by selecting the corner handles with the selection tool and dragging them inwards or out to decrease or increase the size.
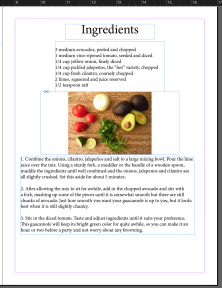
8. Go to the word file with the recipe and copy the ingredients list
9. Draw a text box on the right side and paste the list into it
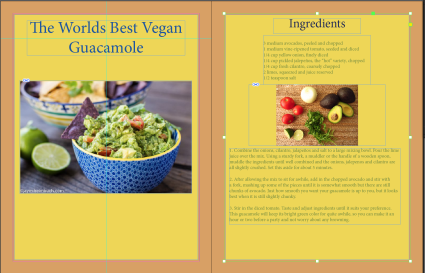
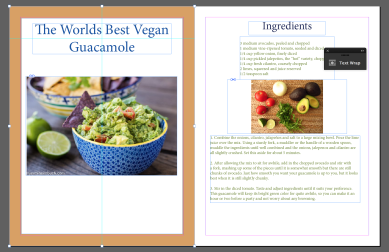
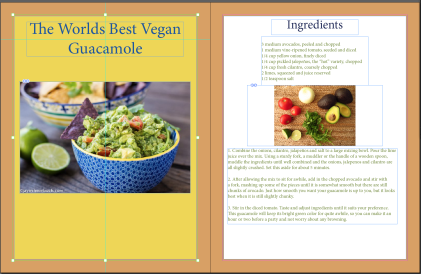
10. Add another text box above and move "Ingredients" to it. Add a third text box below and copy and paste in the directions. Add the image "Ingredients" between the Ingredients list and the directions. It should look like this:
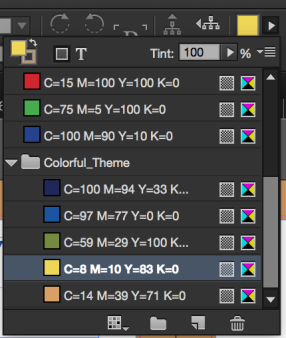
11. Now we want to add some color to the recipe directions. For this we need the color theme tool. ![]()
12. Use the color theme dropper and click on the guacamole in the image. You will then get a color palate based off those colors.
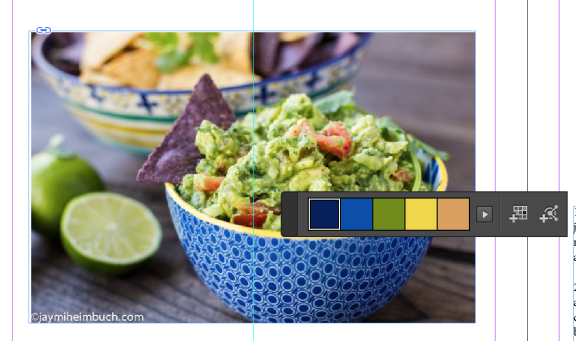
13. Select one of the colors in the palate that appears then move the color them tool dropper over the title. You will notice a "T" appear to the left of the color square when over text. Highlight the text to change it to the selected color.
14. Next we will add a border. Use the rectangle tool to draw a box outlining the existing border.
15. Change the "fill" color (top box) to none

16. Bring the size up to 40pt
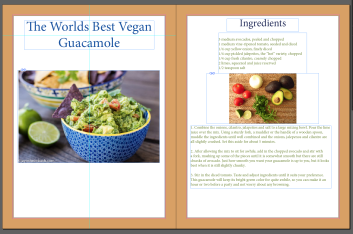
17. Your project should now look like this
18. Copy (command(mac)/control(pc) + C) the border and paste it (command/control + V) to the second page also.
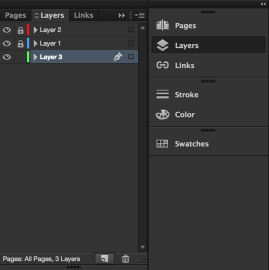
19. Next we will add a background. Create a new layer by going to the layers panel and select new layer at the bottom. Drag this new layer below the existing layers. Lock the existing layers so nothing accidently gets changed on them.
20. If you have not already done so, add the theme colors to swatches by clicking the "add to swatch" button to the right of the colors
. 
21. For this background I am going to use the yellow theme color. For the stroke color, select "none"
22. Use the rectangle tool and draw a box inside the border. You should get something like this.
23. Copy and paste the background on the second page.