
Photoshop Basics
Digital Media Commons
Fondren Library
Basement Room B-42
http://dmc.rice.edu
dmc-info@rice.edu
713-348-3635
Photoshop Basics Handout
Jane Zhao & Bradley Selke
Digital Media Commons, Fondren Library
last updated Tuesday, March 17, 2015
Outline
- Workshop Objectives
- Introduction
- Photoshop basics
- Photoshop interface
- Cropping images
- Resizing images for different purposes
- Fixing and enhancing images
- Removing a background
- Saving a transparent image
- Adding text and change color
...
Introduction
Definition: Photoshop is the predominant photo editing software created by Adobe. It has been used to create images for Internet and Print. Examples include posters, CD covers, online images, etc. Availability: Photoshop is available for both PC and Mac. As of August 2014, Adobe Creative Suite including Photoshop is only available at the Digital Media Commons and the student lab of Anderson Hall. None of the other student lab computers (colleges, Mudd, Fondren) will have Adobe Creative Suite.
Photoshop Basics
Note: The latest version is Adobe Creative Cloud that requires subscription. This guide was developed using Adobe Creative Suite 5.
- Photoshop Interface
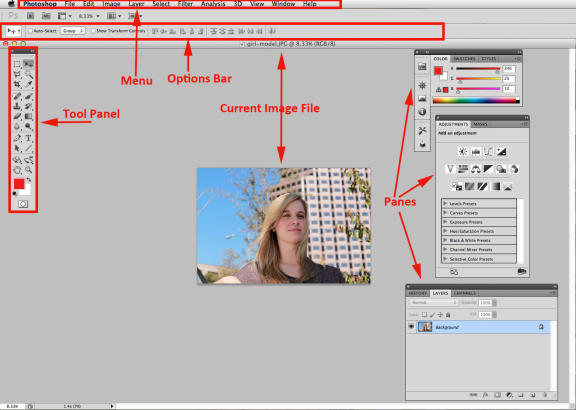
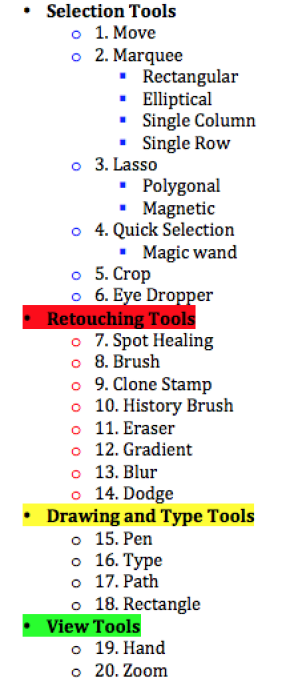
Tool Panel: It contains a bunch of tools for you to edit and create images. These include tools for selecting specific areas of images, cropping images, transforming images, and many more.
Menu: It contains all sorts of options. You can click any menu and see the available functions from the drop-down menu.
Options Bar: It presents different options when different tools are selected. When a tool isn't behaving as you expect it to, the options bar should be the first place you look to fix it.
Panes: Panes can be opened and closed. They display different types of information. If you can't locate a specific pane, go to the Windows menu, and select that pane to open and view it.

...
Activity 2: cropping a picture to the dimension of 4"x 6 " (height x width) using the crop tool bar(use girl-model.jpg)
- Resizing an image for different uses
...
- Open the file red-leaf.jpg.
- Image menu -> Image Size (or press Shift-Ctrl/-I.). !worddave7d95e453badad7fa9dfd74aacd0fb3c.png|height=325,width=413!Uncheck the box of Resample Image, put 300 for Resolution. Look at the Document Size in inches, which is what you can print with the current pixel dimensions.
- Then check the box of Resample Image, select Bicubic Smoother (best for enlargement). Put 20 inches for Height. Then click OK button.
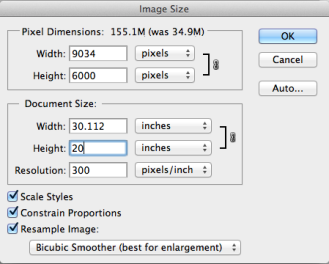
- Or adjust the Document Size to what you want the physical size of your print to be. Check in the Pixel Dimensions part of the menu whether your new size is above 200%. If it is, you are strongly recommended to find a larger original image.
- Go to File-> Save as, Format – JPEG, Save as a copy, on the JPEG options window, choose Quality 12 Maximum. Then click OK button. You want to preserve the highest quality you can.
- Fixing and enhancing an image
- Straighten an image Activity 1: Straightening an image
- Open the file named Lovett-hall.jpg.
- Straighten an image Activity 1: Straightening an image
 In the fly-out menu behind the dropper tool select the Ruler tool.
- Click, hold, and drag to create a line across a part of an image that should be straight. Examples include rooftops of buildings and horizons.
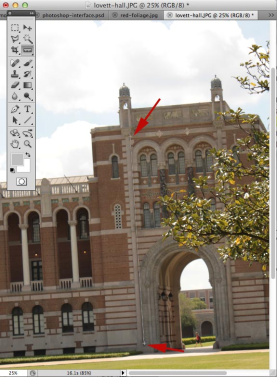
- Click the Straighten button in the options bar up top.
- Touch up photos
- Clone stamp tool
...
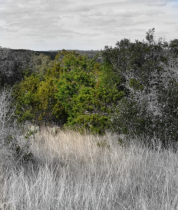
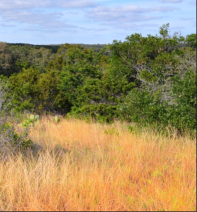
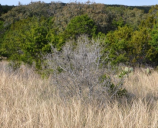
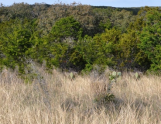
- Open the file named lost-maples.jpg.
- Right click on the Dodge Tool to reveal the fly-out menu and select the Sponge tool
- Select Saturate or De-Saturate from the top menu
- Draw over the areas you want to adjust
- From left to right: after using De-saturate Sponge tool, the original, after using Saturate Sponge tool.

- Spot Healing Brush

This tool can be used to make unwanted elements such as dark spots, bugs, etc., disappear just by clicking on them! Make sure to select "content aware" on the options bar. Use the bracket keys ([ ]) to adjust the size of the tool. You can also click, hold down and drag the cursor to remove longer objects such as cracks. See the images below.
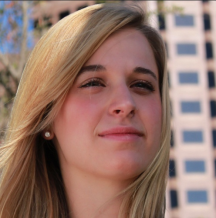
Activity 1: Using Spot Healing Brush to remove blemishes(use girl-model.jpg)
- Open the file name girl-model.jpg.
- Click to select Spot Healing Brush
 .
. - On the options bar, choose the right size, check "content aware", then click over the blemishes on the model's face.
- Image before and after the use of Spot Healing Brush.
Anchor _GoBack _GoBack 
- Dragging to remove large spots such as cracks


- Quick Selection tool
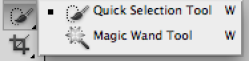 The Quick Selection Tool is somewhat similar to the Magic Wand in that it also selects pixels based on tone and color. But the Quick Selection Tool goes far beyond the Magic Wand's limited abilities by also looking for similar textures in the image, which makes it great at detecting the edges of objects. And unlike the Magic Wand where we click on an area and hope for the best, the Quick Selection Tool works more like a brush, allowing us to select areas simply by "painting" over them! Activity 1: Using Quick Selection tool to make a selection.
- Open the file named piano.jpg.
- Select Quick Selection tool
 , choose size 4.
 - Click inside the area of the first letter N.
- Hold down Shift key and click an area to add to the existing selected area.
- Hold down ALT/Option key and click an area to remove from an existing selected area.
- After you are satisfied with the selection of N, Ctrl/Command + C to copy it and Ctrl/Command + V to paste it.
- Select Move tool
 , drag the pasted N to the faded letter N.Note: The selection may be inverted by using Shift+Command+I. You can also add a new adjustment layer to make the desired changes
![]()
![]()
- Lasso Tool (content aware)
...
- Outline an object you want to remove from a photo
- Select Edit>Fill, make sure "Use" is set to "Content Aware" and press OK.
- Marquee Selection tools
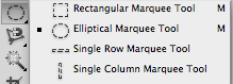
The Marquee selection tools have the same functions as the Lasso Tool and Quick Selection Tool, but instead use fixed shapes where only the size of the shape can be adjusted.
- Rectangular marquee tool: This is the default selection setting. You can make a selection of any rectangular size and shape.
- Elliptical marquee tool: This tool, available when you click and hold down on the selection tool region of the tool bar, selects elliptical spaces. To select a round area, hold the shift key while clicking and dragging.
- Single row: This tool will select a 1pixel region that is as wide as your image. Very useful for trimming edges and making straight lines.
- Single column: The tool will select a 1pixel region that is as tall as your image. Also very useful for trimming edges and making straight lines.
- Magic Wand Tool
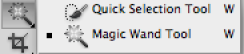
The magic wand tool is similar to the lasso tool except that rather than dragging to make a selection, you click in a region and a selection appears around similar colored pixels. You can control how similar pixels must be to be included in the selection by altering the tolerance value. This tool is useful for selecting monochromatic regions or pieces of high-contrast images.
- Adjusting exposure and level
- Brightness/Contrast layer
 : Adjusts the tonal range of the image. Brightness adjusts the highlights and contrast adjusts the shadows.
 - Levels layer
 : Adjusts the shadows, midtones, and highlights.
 - Curves layer
 : Adjusts precise points in an image
 - Exposure layer
 :
:- Exposure adjusts the highlights
- Offset adjusts the midtones
- Gamma adjusts the dark tones only
- Vibrancy layer
 : Increases saturation, mostly on the least saturated colors
 - Hue/Saturation layer
 : Allows adjustments of specific colors
 - Color balance layer
 : Changes the mixture of colors
- Brightness/Contrast layer
- Add the brightness/contrast layer and adjust the brightness to -10
- Add the vibrancy layer and adjust to +15
- Removing a background (use girl-model.jpg)
- Use the Quick Selection Tool and drag around the area you want to remove. When you have made your selection, right click and select Inverse (Shift+CMD+I).
- If your image is locked. Double click the pad lock icon to unlock it.
- Select Add Layer Mask
 in the layers panel.
 - Immediately you will see the background is gone.
- Right click on the mask in the layers panel and select Refine Mask.
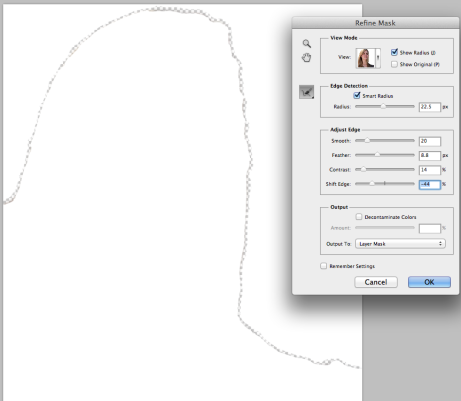
- Check Show Radius. There is nothing to begin with, but by adjusting the radius slider, you will see the radius is picking up all of the stray hairs and getting rid of the background between them. Uncheck Show Radius to go back to Refine Mask View mode.
- Adjust Edge be adjusting the sliders for Smooth, Feather, Contrast, and Shift Edge until you are satisfied with the look you've achieved. Then click OK button.
- If desired, add a new background by opening your desired one in Photoshop and dragging your cut-out image onto it.
- The original image and the image after removing the background:
...
- Adding a new background to an image
- If your image has an existing background, remove it using the steps above
- For this demo use Lost-Maples.jpg as the background to place behind the girl model. Drag lost-maples into the Photoshop window with girl model open.
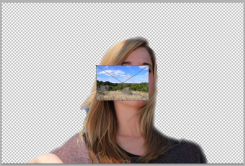
- Adjust the size of the image by using the curser to drag from the sides and corners. Make the necessary adjustments to make the portion of the image you want as the background fill the transparent areas.
- In the layers tab, drag the lost-maples layer down below the girl-model layer

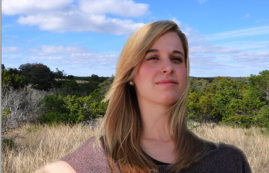
- You might need to go through with tools such as the eraser tool and spot healing brush to fix minor blemishes to make the image look as good as possible. The end result should look similar to this:
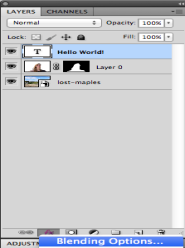
- Adding text and changing text color

- Placing text in the background
- Use the Text tool and draw a text box where desired. Select the font size and style from the top menu
- Select the Eraser tool. Zoom in on the areas to be erased to be more precise. Erase the areas of text that overlap the foreground objects so that the text looks like it is part of the scene.

- Changing Text Color and designs
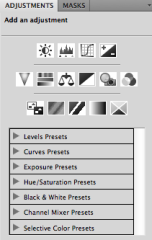
- Select the text layer in the layers tab, then select the "FX" button at the bottom. In the fly-out menu select "Blending Options
- The "Layer Style" window will appear.
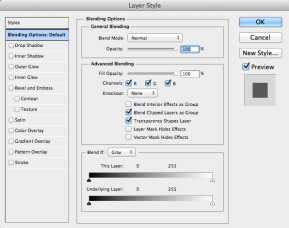
- Select the text layer in the layers tab, then select the "FX" button at the bottom. In the fly-out menu select "Blending Options
- Changing Text Color and designs
...
- Change opacity to 50%
- Drop Shadow: 80% Opacity and 150 degree angle
- Inner Shadow: 25% Opacity and 45 degree angle
- Bevel and Embross: 141% Depth, 128px size, 11px soften
- Check Texture box
- Saving a transparent image (No Background color or image) Activity 1: Using Quick Selection tool to make a selection.
- Open image named dmc-equipment.jpg;
- Double click on the padlock icon in layer panel to unlock the image;
...
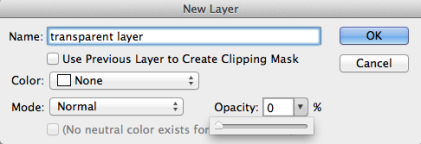
- Add a new transparent layer to an existing project by going to Layer>New>Layer. Name the layer and make sure Opacity is 0%. Press "OK." Drag the layer below the image layer in the layers window.
- Select the dmc-equipment layer;
- Add a new transparent layer to an existing project by going to Layer>New>Layer. Name the layer and make sure Opacity is 0%. Press "OK." Drag the layer below the image layer in the layers window.

- Use a tool such as the magic wand tool or lasso tool to select the areas you wish to make transparent. In this example, use the magic wand tool to select the background. You will see moving lines start circling around the objects in the image and around the border. If you need to add more to the selection hold down "SHIFT" and select the desired areas. If areas you do not want selected get selected, hold down "ALT/OPTION" and click on those areas to de-select. These are the same steps in the previous section of removing a background.

Once you have selected the areas then push the delete key.
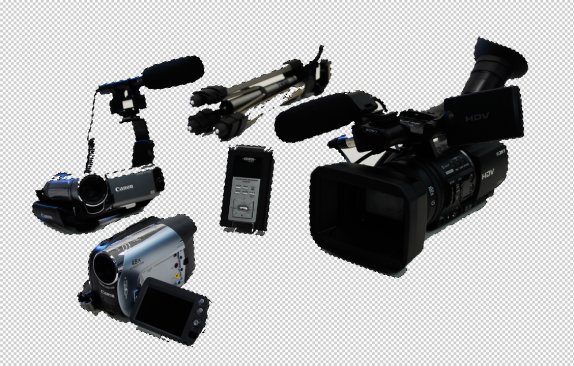
The transparent part will be checkered. This pattern is not part of the image. It is just there to help you identify transparent areas.
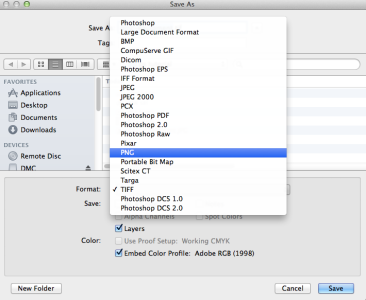
- Go to File>Save as… Format – PNG, and save it as a copy. Note: The JPEG format will not save transparent images.
References and Resources
- Getting started with Adobe Photoshop https://www.ischool.utexas.edu/technology/tutorials/graphics/photoshop7/
- http://www.photoshopessentials.com
- Removing a background in photoshop http://www.digitalartsonline.co.uk/tutorials/photoshop/how-remove-background-in-photoshop/
- How to use typography with photography http://blog.slideshare.net/2014/03/31/how-to-use-typography-with-photography/
...