...
- On the Desktop, double-click the Imagery folder.
- Double-click the Imagery.aprx project file to open the project in ArcGIS Pro.
- Maximize the ArcGIS Pro application window.
Before you can georeference an image, you must have existing GIS data with known coordinates containing similar features to those in the image. While you can georeference to the built in basemaps, additional vector data can be helpful, because vector data can lay on top of the imagery you are trying to georeference, so they can be seen simultaneously, whereas relying on the basemap would require repeatedly toggling the image on and off or adding a transparency to the image, so that both the image and the basemap are visible, but this type of display can be more difficult to interpret. Since you will be georeferencing an aerial image of the Rice campus, have vector layers related to campus features would be helpful.
...
- In the Table of Contents, uncheck the parking and sidewalks layers to make the aerial image easier to view.
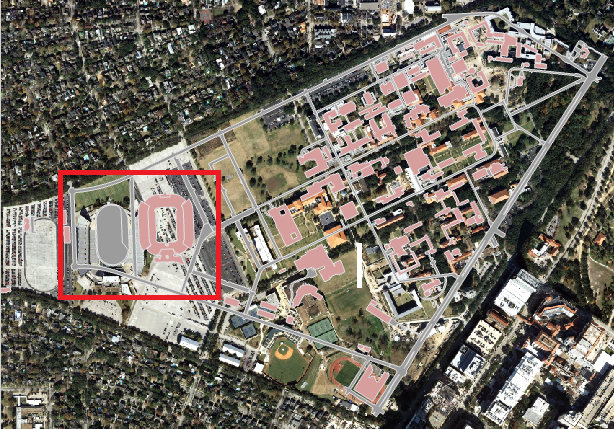
- Visually, identify the football stadium in both the aerial layer and the buildings layer.
Hold down Shift and your cursor should switch from a pointer finger to a magnifying glass with a plus sign.
Info title Tip If you don't see the proper cursor, then you may need to re-select the Explore button on the Map tab in the ribbon.
- On the western portion of campus, click and drag a box around the football stadium in both layers to zoom into the area in which you will add your first control point.
- In the ribbon, on the Georeference tab, click the Add Control Points button. Your cursor will change to a crosshair.
Click on the southwest corner of the upper deck of the stadium in the aerial layer.
Info title Tip If your first click is on an unintended location, press Esc to remove the point. Then click the Add Control Points button again to resume adding a point.
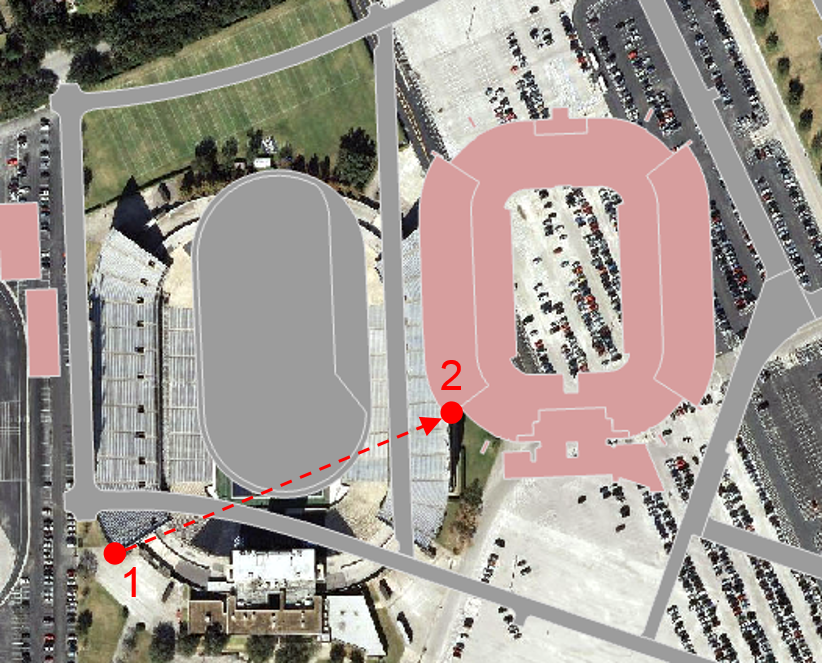
- With a line linking to the first point you clicked on, click on the southwest corner of the upper deck of the stadium on the buildings layer.
...
- Visually, identify Fondren Library in both the aerial layer and the buildings layer.
- In the ribbon, click the Map tab and click the Explore button.
- In the center of campus, hold down Shift and click and drag a box around Fondren Library in both layers to zoom into the area in which you will add your second control point.

- On the ribbon, click the Georeference tab and click the Add Control Points button.
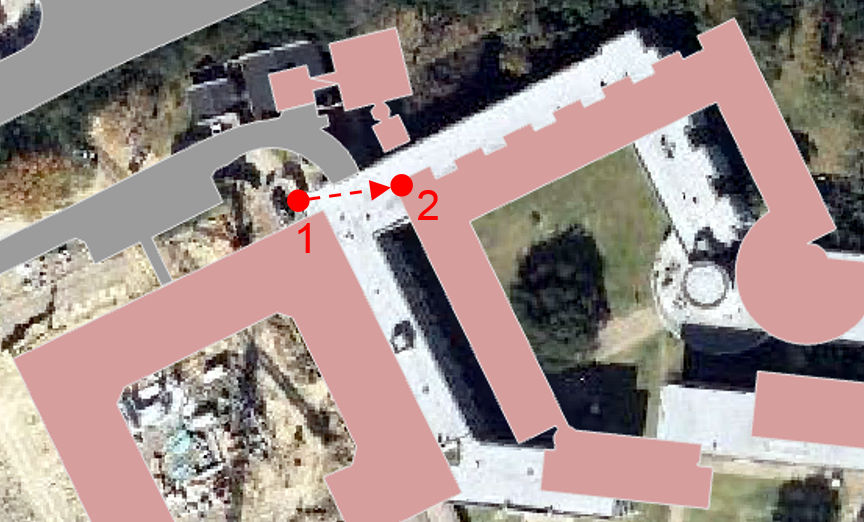
- Click on the southwest corner of Fondren Library in the aerial layer.
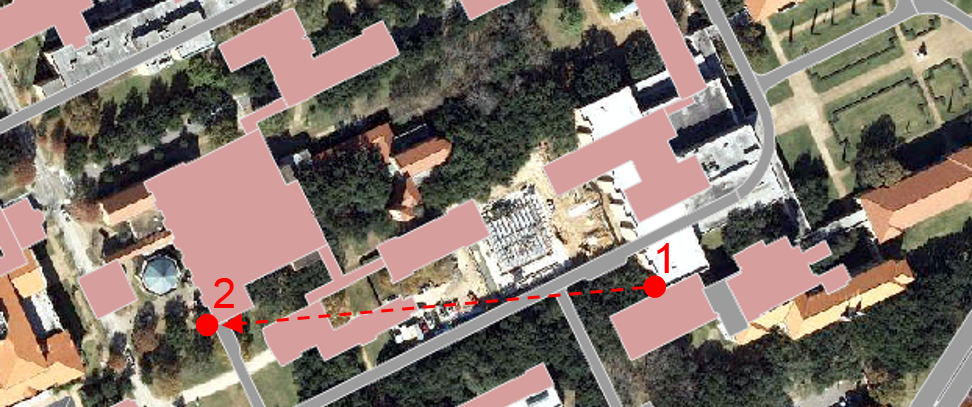
- With a line linking to the first point you clicked on, click on the southwest corner Fondren Library on in the buildings layer.
The two points will snap together, lining up the image at that particular control point.
...
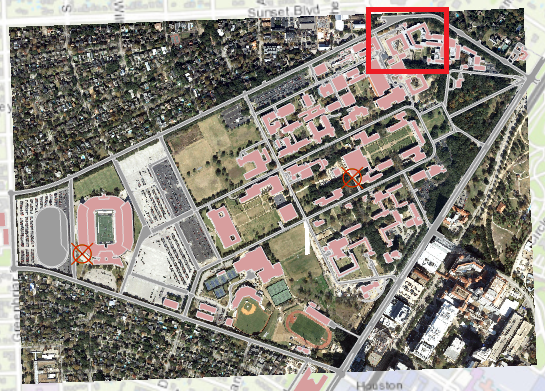
Notice that, in the northern-most section of campus, the buildings are not quite aligned. You will add a third control point in that area.
- Visually, identify Martel College in both the aerial layer and the buildings layer.
- In the ribbon, click the Map tab and click the Explore button.
- In the northern-most portion of campus, hold down Shift and click and drag a box around Martel College in both layers to zoom into the area in which you will add your third control point.
- In the Georeferencing toolbar, click the Add Control Points button.
- Hold down the Spacebar and click Click on the northwest corner of Martel College in the aerial layer.
- Release the Spacebar and, with With a line linking to the first point you clicked on, click on the northwest corner Martel College on the buildings layer.
- In the Table of Contents, right-click the streets layer and select Zoom to Layer to return to the full extent of the image.
...