...
Opening an Existing Project
- Using Windows Explorer, locate and open On the Desktop, double-click your Intro folder to open it.
- Double-click the Intro.aprx file to open the existing project in ArcGIS Pro.
...
You will notice that a new map view opens in the main section of ArcGIS Pro.
The panel on the left side of ArcGIS Pro is called the Contents pane. You will also notice that After creating a new map, the Contents pane now displays the default Map title and shows automatically adds the Topographic basemap layer . Finally, in to the map.
The panel on the right side of ArcGIS Pro is called the Catalog pane on the right. After creating the first map, a new Maps section has been added to the top of the Project tab within the Catalog pane.
- In the Catalog pane, click the arrow to expand the Maps section.
Notice that there is a single map there, named "Map". Since most projects will have multiple maps, it is a good idea to name your maps with more descriptive titles.
...
Browsing Existing Data
As a reminder, in the Intro to GIS Data Management tutorial, we imported the feature classes of interest into our project geodatabase.
- In the Catalog pane, click the arrow to expand the Databases section.
- Click the arrow to expand the Intro.gdb geodatabase.
Adding Data to a Map
- Right-click the Census_2010_By_SuperNeighborhood feature class and select Add To Current Map.
- Alternatively, An alternative method of adding data to a map is to click and hold the Major_Roads feature class and drag and drop it into the Super Neighborhoods map view.
...
- For 'Symbol', click the colored line symbolsymbol to switch to Format Line Symbol mode.

- Click Within Format Line Symbol mode, click the Properties tab.

- For 'Color', use the drop-down menu to select Black.
- In At the bottom of the Symbology pane, click Apply.
- In the Contents pane, select the Census_2010_By_SuperNeighborhood layer.
- For 'Symbol', click the colored rectangle symbolIn the Symbology pane, again click the colored rectangle symbol to switch to Format Polygon Symbol mode.
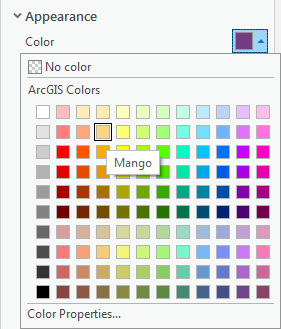
- For 'Color', use the drop-down menu to select Mango.
- For 'Outline color', use the drop-down menu to select Gray 50%.
- Click At the bottom of the Symbology pane, click Apply.
Navigating the Project
...
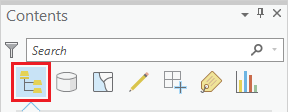
At the top of the Contents pane, there is a series of seven buttons. By default, the leftmost button is selected, : List by Drawing Order.
When this button is selected, the order in which the layers are listed corresponds to the order in which the layers are visually stacked in the Map view. To test how the drawing order works, let's you will reorder the layers.
- In the Contents pane, click and hold the Census_2010_By_SuperNeighborhood layer name and drag and drop it above the Major_Roads layer.
You will notice that, in the Map view, the Census_2010_By_SuperNeighborhood layer is now drawn in on top of the Major_Roads layer, meaning that freeways are only visible in areas not covered by a super neighborhood. It is possible to add transparency to the super neighborhood layer or to symbolize it with a bold outline and a hollow fill, but, in general, it is best to have polygon layers at the bottom, so we will return the layers to their previous order.
...
- Uncheck the Major_Roads layer to turn off its visibility in the map view.
- Re-check Check the Major_Roads layer to turn its visibility back on in the map view.
...
- On the Map tab, in the Navigate group, ensure that the Explore button is selected by default.
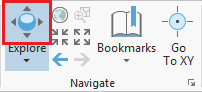
To pan the map:
- Click Within the map view, click and hold the left mouse button and drag the mouse and release.
...
A spatial bookmark allows you to quickly return to a particular zoom extent in your Map view.
...
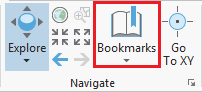
- On the Map tab, in the the Navigate group, click the Bookmarks button and select New Bookmark....
- In the 'Create Bookmark' window, for 'Name:', type "Houston" and click OK.
- To test the bookmark, use panning and zooming to change the extent of the map.
- Again, click the Bookmarks button and this time select the Houston bookmark to return to that extent.
...
- On the Map tab, in the Selection group, click the Select button.

- In the map view, click on any neighborhood to select it. The selected neighborhood will be outlined in cyan.
- Drag a box to select multiple adjacent neighborhoods.
- Hold down Shift and click any non-selected neighborhood to add additional non-adjacent neighborhoods.
- Hold down Ctrl and click to deselect neighborhoods.
...