...
This action stores the attribute values for that feature. Notice that the entry for the feature on the top of the pane is no longer a generic number but has been replaced with the more descriptive Visitor Center, as show shown below.
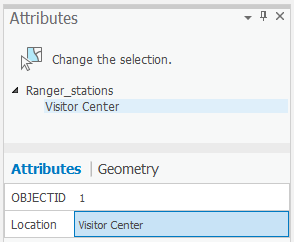
10. Close the Attributes pane.
...
- Click the Map toolbar tab and click the Bookmarks menu to select the Digitizing roads bookmark.
The extent is just south of the point feature you created in the previous exercise. - On the Edit toolbar, click the Snapping pull-down menu and click the Snap icon to ensure that snapping is on (highlighted).
...
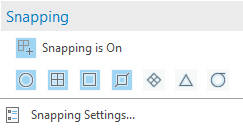
- Look on the Snapping drop-down menu and confirm that End , Vertex , and Edge snapping types are active. When enabled, the buttons are highlighted with a blue square. If they are not enabled, click each button to enable those agents.
- Click the Snapping pull-down menu and select Snapping Settings…
From this dialog box, you can specify settings for snapping in
...
- ArcGIS Pro.
- Ensure the XY tolerance is at least 10 pixels.
The snapping tolerance is the distance within which the pointer or a feature is snapped to another location. If the element being snapped to—such as a vertex or edge—is within the distance you set, the pointer automatically snaps to the location. - Click OK to close the Snapping Settings dialog box.
...