TABLE OF CONTENTS
| Table of Contents |
|---|
| Info |
|---|
This guide was created by the staff of the GIS/Data Center at Rice University and is to be used for individual educational purposes only. The steps outlined in this guide require access to ArcGIS Pro software and data that is available both online and at Fondren Library. The following text styles are used throughout the guide: Explanatory text appears in a regular font.
Folder and file names are in italics. Names of Programs, Windows, Panes, Views, or Buttons are Capitalized. 'Names of windows or entry fields are in single quotation marks.' "Text to be typed appears in double quotation marks." |
...
- On the Desktop, double-click your the Intro folder to open it.
- Double-click the Intro .aprx file ArcGIS Project File (blue icon) to open the existing project in ArcGIS Pro.
- Maximize the ArcGIS Pro application window.
Creating a New Map
A map is a project item used to display and work with geographic data in two dimensions. The first step to visualizing any data is creating a new map. The ribbon runs horizontally across the top of the ArcGIS Pro interface. Tools (buttons) are organized into tabs along the ribbon.
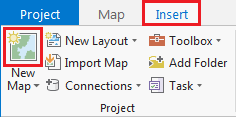
- On the ribbon, click the Insert tab.
- In the Project group, click the New Map button.
You will notice that a new map view opens in the main section of ArcGIS Pro.
The panel on the left side of ArcGIS Pro is called the Contents pane. After creating a new map, the Contents pane now displays the default Map title and automatically adds the Topographic basemap layer to the map.
The panel on the right side of ArcGIS Pro is called the Catalog pane. After creating the first map, a new Maps section has been added to the top of the Project tab within the Catalog pane. - In the Catalog pane, click the arrow to expand the Maps section.

Notice that there is a single map there, named "Map". Since most projects will have multiple maps, it is a good idea to name your maps with more descriptive titles. - In the Catalog pane, under the Maps section, right-click Map and select Rename.
- Type "Super Neighborhoods" and hit Enter.
...
Symbolizing Layers with a Single Symbol
It is early in the project to be deciding upon symbology, however, when When layers are added to a map, ArcGIS Pro assigns then a random color symbol. Sometimes the colors are very faint and difficult to see on top of the basemap or the colors of multiple layers are very similar to each other and difficult to distinguish. To ensure that everyone can easily see the layers we are working with, we will adjust the basic symbology.
- In the Contents pane, right-click the Major_Roads layer name and select Symbology to open the Symbology pane on the right.

Notice that the 'Primary symbology' defaults to Single Symbol. With this type of symbology, all features in that particular layer will be assigned the same symbol. - For 'Symbol', click the colored line symbol to switch to Format Line Symbol mode.

- Within Format Line Symbol mode, click the Properties tab.

- For 'Color', use the drop-down menu to select Black.
- At the bottom of the Symbology pane, click Apply.
The freeways on the map should now all be black and easily visible on top of the basemap. The Format Symbol mode of the Symbology tab can be accessed directly via the layer symbol (instead of the layer name) in the Contents pane. - In the Contents pane on the left, click the colored rectangle symbol beneath the Census_2010_By_SuperNeighborhood layer name.

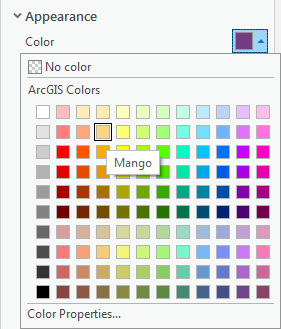
- For 'Color', use the drop-down menu to select Mango.
- For 'Outline color', use the drop-down menu to select Gray 50%.
- At the bottom of the Symbology pane, click Apply.
...