...
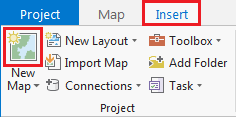
- On the ribbon, click the Insert tab.
- In the Project group, click the New Map button.
You will notice that a new map view opens in the main section of ArcGIS Pro. The panel on the left side of ArcGIS Pro is called the Contents pane. After creating a new map, the Contents pane now displays the default Map title and automatically adds the Topographic basemap layer to the map. The panel on the right side of ArcGIS Pro is called the Catalog pane. After creating the first map, a new Maps section has been added to the top of the Project tab within the Catalog pane. - In the Catalog pane, click the arrow to expand the Maps section.

Notice that there is a single map there, named "Map". Since most projects will have multiple maps, it is a good idea to name your maps with more descriptive titles. - In the Catalog pane, under the Maps section, right-click Map and select Rename.
- Type "GISWorkshop" and hit Enter.
...
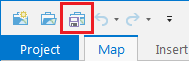
- Above the ribbon, on the Quick Access toolbar, click the Save button.
Data Management
...
- In the Catalog pane, right-click Folders and select Add Folder Connection.
- Navigate to your personal downloads folder and click on Downloads.
- Click OK.
- In the Catalog pane, expand Downloads and then expand the Workshop_Data folder.
- You should see A, B, C. Your Workshop_Data folder should look like the below image.

Adding Data to a Map
...