...
- In the Contents pane, right-click HST.jpg then click Zoom to Layer.
- In the Contents pane, click HST.jpg so that is highlighted in light blue. From the Ribbon, click the Imagery tab and then click the Georeference button.
- Click Add Control Points.

- Left-click the top left corner of the HST JPG. This selects this point on the JPG to georeference. If you need to zoom in and pan around to see the corners of the JPG, you can move the mouse scroll wheel to zoom and click and drag the mouse scroll wheel to pan.
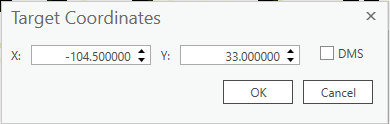
- Right-click anywhere on the map. This opens up a Target Coordinates pop-up box, in which you can manually enter X and Y values.
- Type X : -104.5, Y : 33 and click OK. The x-value is the West coordinate and it is negative because we are in the Western Hemisphere. The y-value is the North coordinate.
- In the Contents pane, right-click HST and click Zoom to Layer.
- Repeat steps 5-8 for the bottom right corner of HST, but type X : -103.5, Y : 32.
- Repeat steps 5-8 for the bottom left corner of HST but type X : -104.5, Y : 32.
- Repeat steps 5-8 for the top right corner but type X : -103.5, Y : 33.
Your georeferenced HST should look like this:
- From the Georeferencing tab, click Save.

- Then click Close Georeference.
- Above the Ribbon, on the Quick Access toolbar, click the Save button.
...