...
If you are completing this tutorial from a computer in Fondren Library and are logged in using the gistrain profile, follow the instructions below:
- In the taskbar at the bottom of the screen, click the File Explorer Application.
 From the Start menu, click the Documents button.
- In the Navigation pane on the left side of File Explorer, double-click GISData (\\smb.rdf.rice.edu\research\FondrenGDC) (O:) > GDCTraining > 1_Short_Courses > Introduction_to_GIS_Data_Management > Downloads.
- To create a personal copy of the tutorial data, select all four zip folders and drag them into the Downloads folder in the Navigation pane.
- Close all windows.
...
- Click Downloads.zip above to download the tutorial data.
- Open your Downloads folder.
- Right-click the compressed Downloads folder and select Extract All....
- In the 'Extract Compressed (Zipped) Folders' window, click the Browse... button.
- On the left side of File Explorer in the Navigation pane, single-click the Downloads folder and click the Select Folder button.
- Uncheck Show extracted files when complete.
- Click Extract.
- Right-click the original compressed Downloads folder and select Delete.
...
- .
Preparing the Downloaded Data for ArcGIS Pro
The following step-by-step instructions and screenshots are based on the Windows 10 operating system with ArcGIS Pro for Desktop 2.5.0 software with an Advanced license. If your personal system configuration varies, you may experience minor differences from the instructions and screenshots.
Once you have downloaded the Census and Major Roads data from H-GAC and the Bus Stops and Bus Routes data from Houston METRO and the Census and Major Roads data from HGAC, you should be able to find locate the data files in your Downloads folder.
- Open the Downloads folder.
- Ensure that you see the four folders shown below.

Notice You will see that all the files folders are compressed, or zipped, meaning they contain compressed files of data within them (you , which allows you to download a single ZIP file, instead of numerous individual files. You can tell a file folder is zipped when the file type 'Type' column reads “Compressed 'Compressed (zipped) Folder”). You will need to unzip the folders to be able to see the data inside them. To do that:Folder' and the folder icon has a zipper on it. In order to view and utilize the data within ArcGIS software, you will first need to extract, or unzip, the folders.
- Select
- Open the Downloads folder.
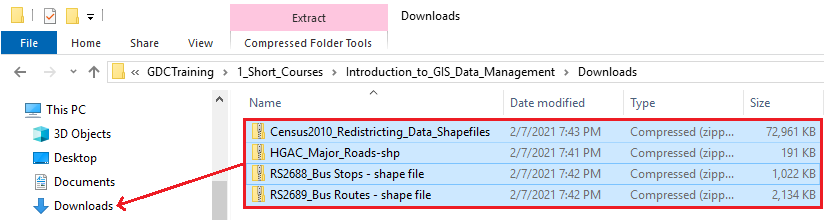
- Ensure that you see the following zipped folders in your Downloads folder.
Census2010_Redistricting_Data_Shapefiles
HGAC_Major_Roads-shp
RS2688_Bus Stops - shape file
RS2689_Bus Routes - shape file
- Select all four folders.
- Right-click any of the selected folders and select7-Zip > Extract here. If you do not have 7-Zip, you will need to right-click each file individually and selectExtract all, then click Extract.
...
Creating a New Project in ArcGIS Pro
- From the Start menu, launch ArcGIS Pro.
- When ArcGIS Pro opens, under the New section, click the Map project template.
- In the 'Create a New Project' window, for Name, type "Intro".
- For Location, click the Browse... button to the right.
- In the 'Select a folder to store the project.' window, click Computer in the left column and click Desktop in the right column and click OK.

- In the 'Create a New Project' Window, click OK.
- Maximize the ArcGIS Pro application window
...