...
- In the Contents pane, right-click the HGAC_tracts layer name and select Data > Export Features.
- In the Geoprocessing pane, for 'Output Feature Class' type "HarrisTracts". If the full file path is shown, ensure that you leave everything in the file path through Intro.gdb\.
- At the bottom of the Geoprocessing pane, click Run.
- To see the results, in the Contents pane, right-click the newly exported HarrisTracts layer name and select Zoom To Layer.
- In the Contents pane, right-click the original HGAC_tracts layer and select Remove. Note that this process does not delete the layer from you your project geodatabase, but only removes the layer from this particular Census Tracts map.
...
- In the 'Selecting Features By Attributes' section above, repeat steps 2-5 for the HarrisTracts layer with the expression: (GEOID10 is equal to 482014120048201412100). You can type in the FIPS code to have it highlighted in the drop-down list rather than scrolling through the entire list to locate it.
You should see the Rice University census tract selected on your map, as shown below. Next you will zoom in closer.
- In the Contents pane, right-click the HarrisTracts layer name and select Selection > Zoom To Selection.

- In the 'Exporting Selected Features' section above, repeat steps 21-5 with the e3 with the HarrisTracts layer. for 'Output Feature Class' type "Rice".
Selecting Features Selecting Features By Location
Now we will create a map of the bus stops and bus routes within your neighborhoodthat serve the Rice campus. We could continue to do our mapping work within the existing map, but, since we are now focusing on different thematic layers in a different geographic extent, this could be a good time to create a second map within our project.
- On the ribbon, click the Insert tab.
- In the Project group, click the New Map button.
- At the bottom of the Geoprocessing pane, click the Catalog pane tab.
- Rename the new Map1 to "Rice Bus Routes".
- From the Catalog pane, within the Intro.gdb geodatabase, add the METRO_BusRoutes, map My Tract and add MyTract, METRO_BusStops and METRO_BusRoutes.
, and Rice feature classes to the new Rice Bus Routes map. - in the Contents pane, right-click the Rice layer name and selectZoom To Layer.
You will now select all the bus stops within the Rice census tract. To include bus stops across the street from Rice, you will add a search distance of 50 feet from Rice.
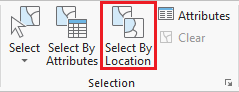
- On the ribbon, in In the Selection group, click the Select By Location button to open the Select Layer By Location tool in the Geoprocessing pane.
- For 'Input Feature LayerFeatures', select select METRO_BusStops.
- For 'Relationship', select select Within a distance.
- For 'Selection Features', select MyTractRice.
- For the 'Search Distance' type, type '50' Feet.
- Ensure the 'Selection type' is 'New selection'.
- Ensure your 'Select Layer By Location' tool settings appear as shown below and click click Run.


Do not clear the selection. Repeat Step 6, searching for, as we will use the selected bus stops to select the bus routes within 100 ft of a bus stop in your neighborhood. - For In the 'Select Layer by Location' tool, for the 'Input Feature Layer', select METRO_BusRoutes.
- For 'Relationship' , select Within a distance for the 'Relationship'. Select .
- For "Selecting Features', select BusStops for the 'Selecting Features'.
- Type '100' for the 'Search Distance'.
- Ensure the 'Selection type' is 'Add to the current selection'.
- Ensure your 'Select Layer By Location' tool settings appear as shown below and click Run.

Your map should now have selected all bus stops within 50 feet of your neighborhood as well as all bus routes that run within 100ft of those bus stops. - In the Contents pane, right-click the METRO_BusStops layer name and select Data > Export Features.
- In the Geoprocessing pane, click the 'Output Feature Class' field to edit the name. Replace HGAC_BusStops with "MyBusStops". Ensure that you leave everything in the file path through Intro.gdb\.
- In the Contents pane, right-click the METRO_BusRoutes layer name and select Data > Export Features.
- In the Geoprocessing pane, click the 'Output Feature Class' field to edit the name. ReplaceBusRoutes with "MyBusRoutes". Ensure that you leave everything in the file path through Intro.gdb\.
- In the Contents pane, right-click and remove METRO_BusStops and METRO_BusRoutes. You should now have three layers in your Contents pane, MyTract, MyBusStops, and MyBusRoutes.
...