...
- Log into your YouTube channel.
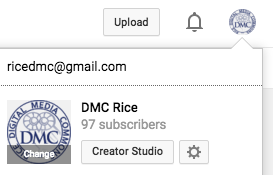
- Click on your account located on upper right corner, then click on Creator Studio
- Within Creator Studio, click on VIDEO MANAGER on the far left
 .
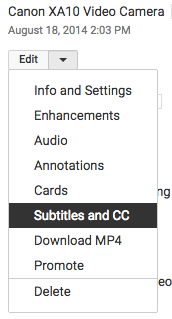
. - Next to the video you want to add subtitles to, click the drop-down menu next to the Edit button and select Subtitles and CC.
- In the drop-down menu, choose the language that's spoken most in the video and click Set language.
- Click the Add subtitles or CC button.
- Choose the type of file to upload
- Click the Choose file button and browse your computer for the file
- The file will auto-populate and let you know the timing of each subtitle or closed caption. Clicking the "CC" icon in the YouTube player turns the subtitles on.
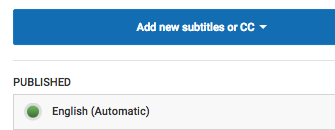
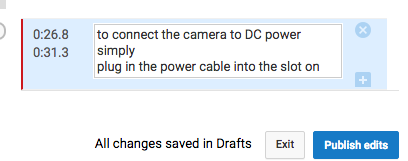
- Note: If you dont have subtitle file, YouTube automatically generates the subtitle for your video IF your audio is clear. If automatic captions are available, they'll automatically be published on the video. You can edit this subtitle instead of creating your own subtitle file. To do so, click on English (Automatic) to open the auto subtitle, then click on edit button to start editing the subtitle. Click on Publish edits to save the updates. You may also click on Actions to download the subtitle as .srt file.
 ----------->
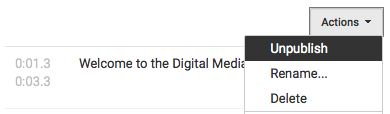
- If you have more than one subtitle uploaded and published to your YouTube video, only the most recent published subtitle will be the active subtitle. To unpublish or delete the subtitle you dont want, click on the subtitle, then click on Actions –> select either Unpublish or Delete.
- For more information, visit https://support.google.com/youtube/answer/2734796?hl=en
...