...
- On the Desktop, double-click the Computer icon > gisdata GISData (\\file-rnassmb.rdf.rice.edu\research\FondrenGDC) (RO:) > > GDCTraining > 1_Short_Courses > > Measuring_Geographic_Distributions.
- To create a personal copy of the tutorial data, drag the GeographicDistribution folder onto the Desktop.
- Close all windows.
...
- In the Geoprocessing pane, click the Spatial Statistics Tools toolbox > Measuring Geographic Distributions toolset > Central Feature tool.
- For ‘Input Feature Class’, use the drop-down menu, select the USStatesPopTimeline layer.
- For ‘Output Feature Class’, rename the feature class "USStatesPopTimeline_CFCentralFeature_1790".
- For ‘Weight Field,’ use the drop-down menu to select the Pop1790 field.
- Ensure your Central Feature tool parameters are configured as shown below and click Run.

...
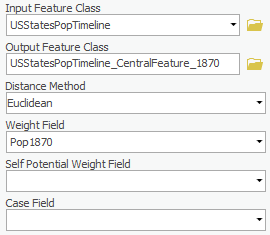
- For ‘Output Feature Class’, rename the feature class "USStatesPopTimeline_CentralFeature_1870".
- For ‘Weight Field,’ use the drop-down menu to select the Pop1870 field.
- Ensure your Central Feature tool parameters are configured as shown below and click Run.
...
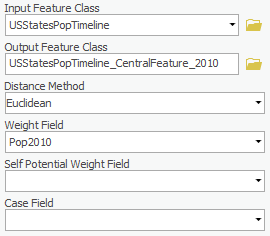
- For ‘Output Feature Class’, rename the feature class "USStatesPopTimeline_CentralFeature_2010".
- For ‘Weight Field,’ use the drop-down menu to select the Pop2010 field.
- Ensure your Central Feature tool parameters are configured as shown below and click Run.
...
- At the top of the Geoprocessing pane, click the Back arrow button.
- Within the Measuring Geographic Distributions toolset, click the Standard Distance tool.
- For ‘Input Feature Class’, use the drop-down menu to select the USStatesPopTimeline layer.
- In ‘Output Standard Distance Feature Class’, rename the feature class "USStatesPopTimeline_StandardDistance_1790".
- For ‘Circle Size’, use the drop-down menu to select 1 standard deviation.
- For ‘Weight Field,’ use the drop-down menu to select the Pop1790 field.
- Ensure your Standard Distance tool parameters are configured as shown below and click Run.

...
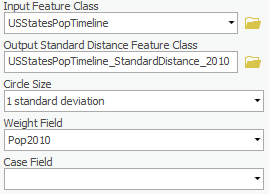
- For ‘Output Standard Distance Feature Class’, rename the feature class "USStatesPopTimeline_StandardDistance_2010".
- For ‘Weight Field,’ use the drop-down menu to select the Pop2010 field.
- Ensure your Standard Distance tool parameters are configured as shown below and click Run.
...
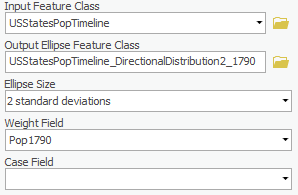
- For ‘Output Ellipse Feature Class’, rename the feature class "USStatesPopTimeline_DirectionalDistribution2DirectionalDistribution2_1790".
- For ‘Ellipse Size’, use the drop-down menu to select 2 standard deviations.
- Ensure your Directional Distribution tool parameters are configured as shown below and click Run.
...
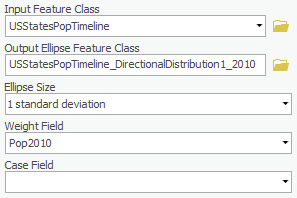
- For ‘Output Ellipse Feature Class’, rename the feature class "USStatesPopTimeline_DirectionalDistribution1DirectionalDistribution1_2010".
- For ‘Ellipse Size’, use the drop-down menu to select 1 standard deviation.
- For ‘Weight Field,’ use the drop-down menu to select the Pop2010 field.
- Ensure your Directional Distribution tool parameters are configured as shown below and click Run.
...
- For ‘Output Ellipse Feature Class’, rename the feature class "USStatesPopTimeline_DirectionalDistribution2DirectionalDistribution2_2010".
- For ‘Ellipse Size’, use the drop-down menu to select 2 standard deviations.
- Ensure your Directional Distribution tool parameters are configured as shown below and click Run.

...
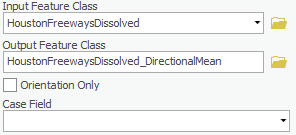
- For the ‘Input Feature Class’, use the drop-down menu,to select the HoustonFreewaysDissolved layer.
- For ‘Output Feature Class’, rename the feature class "HoustonFreewaysDissolved_DirectionalMean".
- Ensure your Linear Directional Mean tool parameters are configured as shown below and click Run.
- In the Contents pane, right-click the HoustonFreewaysDissolved layer name and select Zoom To Layer.
...