Scanning Over-sized Documentsup to 11"x17" Documents
Note:
- For the scanner GT-15000 on station 13, use Image Capture since Epson Scan 2 is not available for this scanner.
- For the scanner GT-2000 on station 4, use either Image Capture or Epson Scan 2.
- Make Make sure the Epson scanner is turned on. The power button can be located on the bottom left of the front of the machine.
- Lift Lift the cover of the scanner and place your document face down on the glass.
- Double click the EPSON Scan icon on the desktop. (Note: It is possible to scan directly into Photoshop. Simply open the application, go to File, Import, Epson GT-15000, and then proceed with the rest of the steps.
- Double-check these settings. Pay special attention to the resolution option:
- Mode - Professional Mode
- Document Type - Reflective
- Image Type - 24-bit Color (8-bit Grayscale if you want black and white)
- Make sure to align the top left corner of your document to the aligning point
- Epson Scan 2
- Double click the Epson Scan 2 icon in the dock.
- For documents, use these settings:
- Mode - Document Mode
- Image Type - Color, Grayscale, or Black & White, depending on the document
- Resolution - For a photo to be used in Powerpoint or Web, use 300dpi. For a photo for archival purposes or book publications, use 1200dpi.
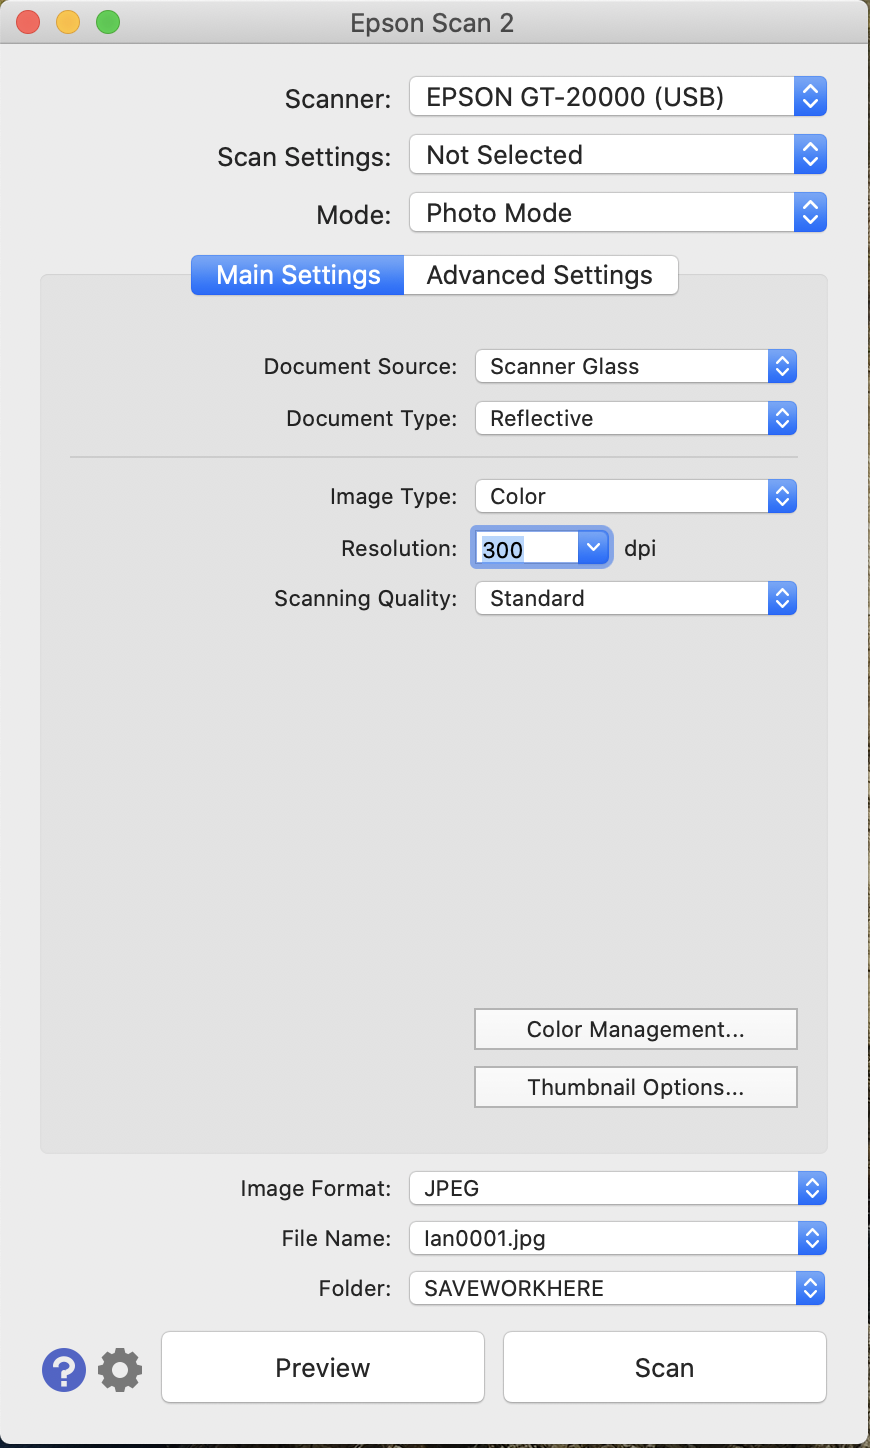
- For photos, use these settings:
- Mode - Photo Mode
- Document type - Reflective
- Image type - Color, Grayscale, or Black & white, depending on the photo
- Resolution - For a photo to be used in Powerpoint or Web, use 300dpi. For a photo for archival purposes or book publications, use 1200dpi.
- Double check these settings:
- File Location – Other: SAVEWORKHERE
- Image Format –
Resolution - - For a photo to be used in Powerpoint or Web, use
200dpi- JPEG. For a photo for archival purposes or book publications, use
600dpi- TIFF.
- Make sure “Thumbnail” is unchecked.
5.
- For a document, use 300 dpi, select PDF, and check the box of "Add or edit pages after scanning".
- Click Preview to see image before scanning. If you wish to scan only part of the photo, drag your cursor to create a selection box around the area you want.
- Click Scan.
- Click Scan.
- Image Capture
- Double click the Image Capture icon in the dock
- Kind
- text - books or documents without images/figures
- Black&white - books or documents with black and white images/figures
- Color - photos or anything with colored contents
- Other settings - refer to Step 3 for Epson Scan 2.

 7. A window will appear with your new scanned document file. If you are satisfied with the result, then close the Scan window and drag your file onto the desktop or into your SaveWorkHere folder.