...
- Turn on the scanner. Lay the page face down on the flatbed of the scanner. Align it to the upper right corner or upper left corner following the arrow sign on the different model of scanners.
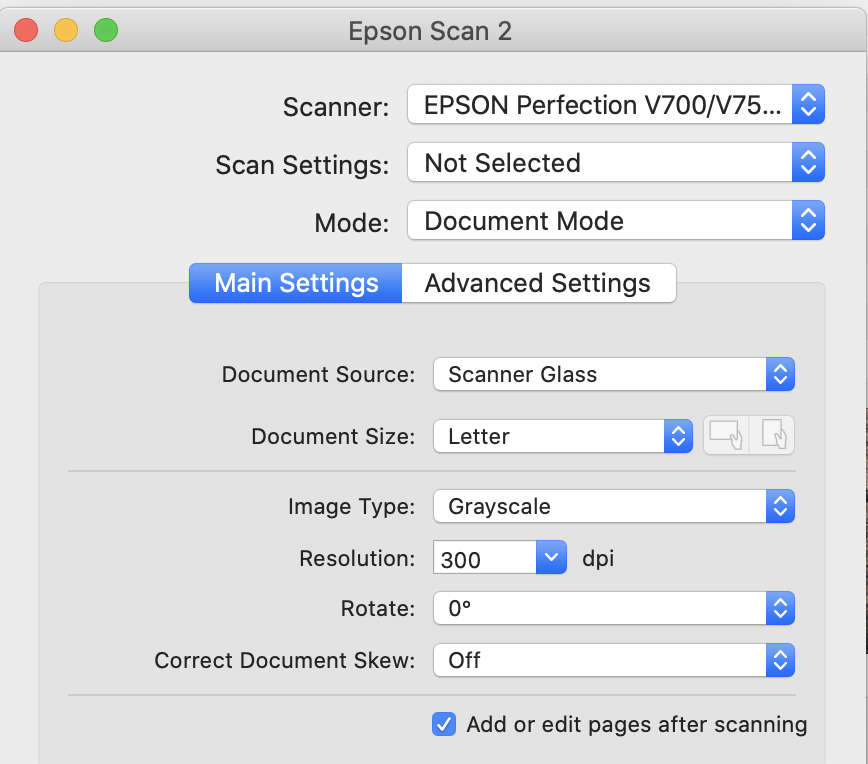
- Open Epson Scan 2
- Select the right scan settings based on the document type
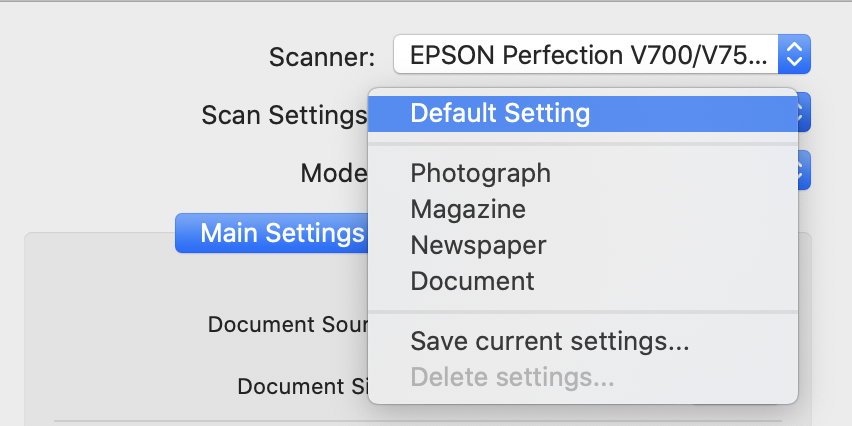
- for a book or document that is just text, doesn't have any colors and images/figures, choose document

- a book or document that has black and white images/figures, select "Document", Grayscale, 300pdi. The scan settings will become "Not Selected".
- for a book or document with color images/figures, choose Photograph
- for a book or document that is just text, doesn't have any colors and images/figures, choose document
- Check the box of "Add or edit pages after scanning".
- Hit "Preview" to see your document before scanning. If you wish to scan only part of the document, drag your cursor on the preview window to create a selection box around that area. When you are ready, hit "Scan".
- After the scan is complete, a pop-up window will appear.
- Put the second sheet of your document (the next page) on the bed of the scanner. Click "Add" to scan additional pages, continuing through the subsequent sheets of your book/magazine/brochure.
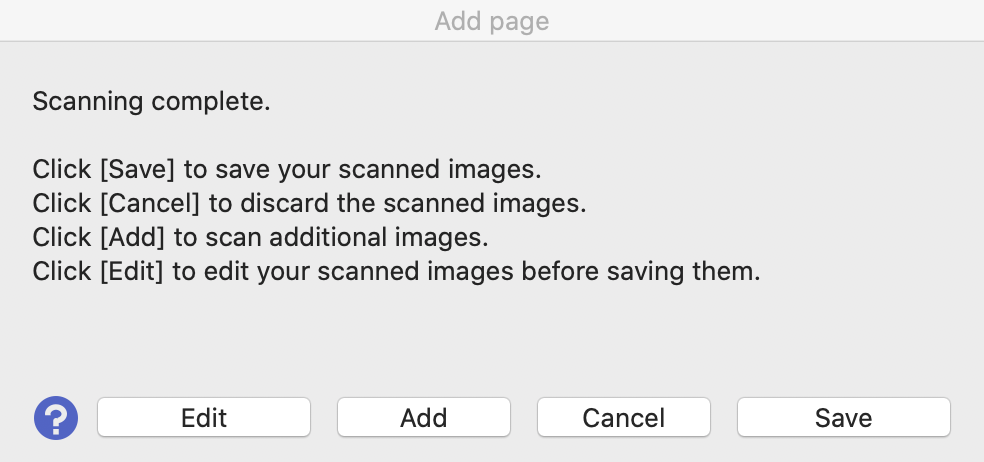
- After you scan your last page, select "Save" to save your scanned pages.
- Locate your saved pdf file in the saved folder.
- Make the PDF searchable (Note that this scanned document is an image pdf file, not searchable yet.)
- In order to make it searchable, open the file with Adobe Acrobat
- Scan & OCR
- Recognize Text in this file
- Language - English
- Recognize Text

- Save your PDF file.