1. Fixing Non-Manifold Geometry
Preface:Anchor preface preface
It is easy to become distracted by new toolkits/workflows or competing software. This guide will briefly go over the most important requirements for prepping your model for a game engine
1. Fixing Non-Manifold Geometry:Anchor fixgeo fixgeo
These will produce errors in the game engine.
Below are 3 alternatives/ fixes to create proper Two-manifold geometry. The un-extruded faces are an intermediate shape. The extrusions are to show how this would look as a structure (architecture models).
Fix Three or more faces that share an edge:
Two or more faces share a single vertex but no edge:
Adjacent faces have opposite normals:
2. Overlapping UVsAnchor uvs uvs
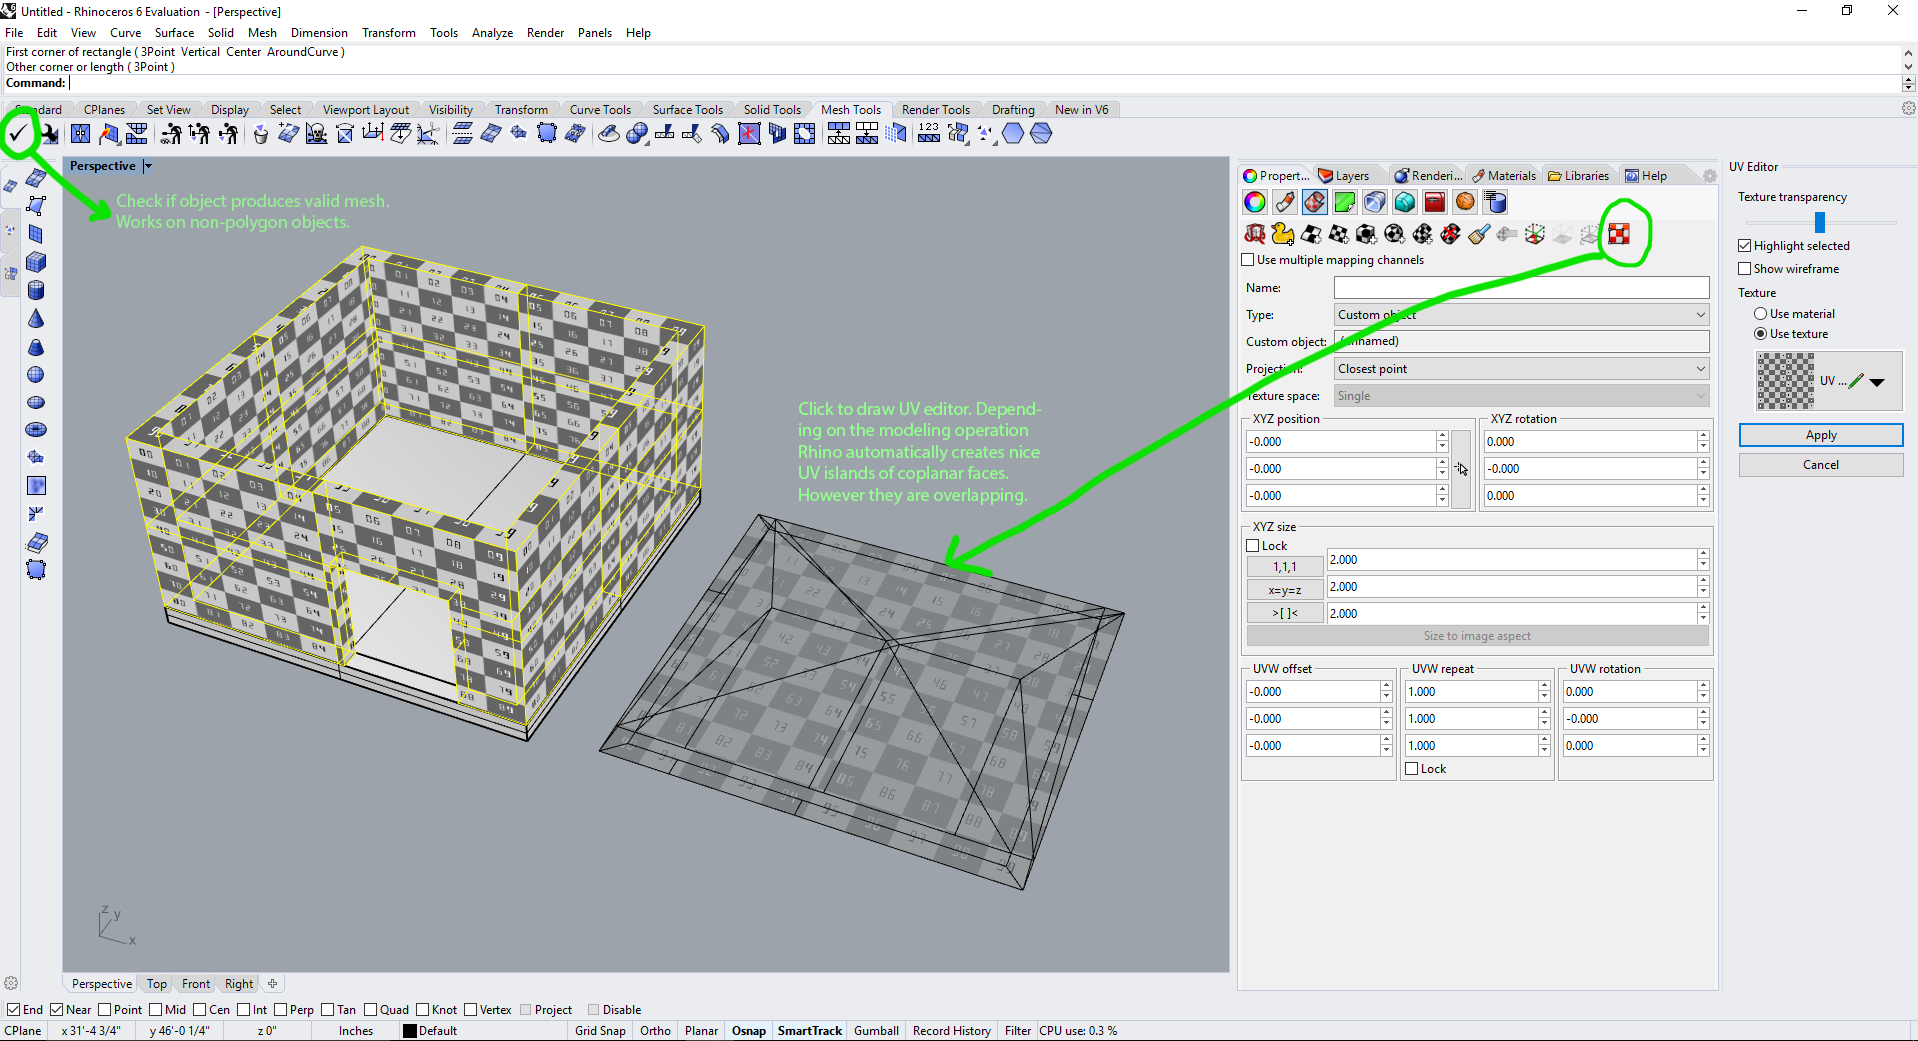
In the case of Rhino 3D your model will already have decent UVs that were created during the modeling process. One could use the UV editor in Rhino and use Align->Distribute commands and transform tools to manually package UVs. This would become tedious with many separate objects and Rhino's limited UV toolset. Therefore I would suggest exporting to Blender or another DCC software to package the UV islands.
Unreal Engine warning if this model is exported as is:
3. Fixing Overlapping UVs Anchor fixuv fixuv
The game engine will bake a lightmap which is a file texture of all the polygon face's interactions with light. It is important for depicting realism. Below is a tutorial for exporting your model as .FBX into Blender to package the UVs for lightmapping. As a side note, a separate UV set can be created for image textures such as a wood grain or marble texture, these allow for overlapping UVs but that is for another tutorial.
Step 1: Important! In Rhino or other modeling program, delete/remove or place on a separate layer all redundant construction items so they are not accidentally exported. Depending on your personal style of modeling, there might be a lot of extra surfaces hiding throughout. This should be a familiar process for submitting final drawings:
Step 2: In Rhino, select all final objects of your model and File -> Export Selected -> "Motion Builder (*.fbx)".
The lowest polygon tessellation will do. If the model has curved surfaces, this setting would need to be tweaked. Depending on the modeling operation Rhino may create too many polygons from a curved surface for the game engine to handle well.
step 3 : Import model into Blender and package UVs. This is the minimum requirement for the game engine. In a proper model, one would spend more time stitching neighboring UVs together and maximizing texture space.
- File->Import FBX
- Select objects (important! right-click selects in Blender!)
- Move cursor to top right of "3D view" panel. Cursor will become cross-hair. Left-click and drag to split "3D view" into 2 "3D view" panels. Change right panel to "UV/Image Editor"
- Select now joined objects in "3D view" and hit TAB to enter edit mode
- Move cursor to "UV/Image Editor" and hit "A" to select all UVs. (important! you should have UVs already from Rhino)
- Select "UVs" then "Pack Islands" in the "UV/Image Editor" panel. Use .05 as margin.
- Move cursor back to "3D view" panel and hit TAB to go back to object mode. Right click select your model if not selected and export as .FBX. Make sure "selected objects" option is ticked.


