...
- On the Desktop, double-click the Computer icon > gisdata (\\file-rnas.rice.edu) (R:) > Short_Courses > > Introduction_to_Geoprocessing.
- To create a personal copy of the tutorial data, drag the Geoprocessing folder onto the Desktop.
- Close all windows.
...
Geoprocessing tools are used to update and analyze data based on a particular criteria. The majority of geoprocessing tools generate a new feature class that differs from the input feature class(s) either in feature geometry or tabular attributes or both.
Merge
The first set of data you will be working with contains the Houston Police Department (HPD) beat boundaries. Though it has been modified for the purposes of this tutorial, the original data was obtained from the City of Houston GIS Database webpage, which is no longer available, but the original data can be obtained from the GIS/Data Center data collection.
...
Notice that the south layer contains 62 beats with the same data fields.
- Close all the NPDBeats_North and NPDBeats_South table views.
At this point, you wish to combine the north and south police beats into a single layer. You will do so using a geoprocessing tool.
- On the ribbon, click the Analysis tab.
- Within On the Analysis tab, within the first Geoprocessing group, click the Tools button.

Notice that the Geoprocessing pane has opened on the right as a new tab on top of the Contents pane. Typically, you would use the 'Find Tools' search box at the top of the Geoprocessing pane to search for the name of the tool you'd like to use, but, at times, especially when learning the software, it can be helpful to view the full hierarchy of all the tools available, because you will often discover related and helpful tools that you didn't know existed and wouldn't know to search for. You might also completely forget the name of a tool, but be able to locate it based on the hierarchy. For these reasons, we will be manually navigating the toolboxes for throughout this tutorial. The more typical workflow of searching directly for a specific tool will be covered briefly at the end of the tutorial.
- At the top of the Geoproccessing pane, click the Toolboxes tab.
- Click the Data Management Tools toolbox > General toolset > Merge tool.
- In the upper right corner of the ‘Merge’ tool, hover over the help button.
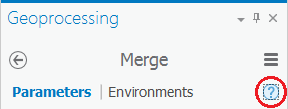
Read the pop-up Merge pane tool help and review the sample illustration. Notice that this tool merges two like datasets covering different geographic extents together into a single dataset. Clicking on, rather than hovering over, the help button will open the full tool documentation in your default web browser.
...
Notice that the when you hover over the 'Output Dataset' field, Output Dataset the file path location defaults to your default project geodatabase (C:\Users\gistrain\Desktop\Geoprocessing\Geoprocessing.gdb).
- For ‘Output Dataset’, rename only the the feature class portion of the file path from HPDBeats_South_Merge or HPDBeats_North_Merge to “HPDBeats".
- Ensure that your Merge tool Parameters tab appears as shown below and click Run.
...
- On the Analysis tab, click the Tools button.
- At the top of the Geoprocessing pane, in the Search box, type “Buffer” and press Enter.
- Click on the first tool that says Buffer (Analysis Tools) to open the tool.
Reviewing Tool History
- At the bottom of the Geoprocessing pane, click the Catalog tab.
- At the top of the Catalog tab, click the History tab.
Within the history tab, you will see a complete list of all of the tools you have run in order. Double-clicking on any tool in the history will reopen the tool with the exact settings used in the run. This is a great way to review previous work for documentation purposes or to rerun a set of tools or slightly modify a setting with minimal thought.