...
Creating a New Project in ArcGIS Pro
- From the Start menu, start ArcGIS Pro. Click on “Configure your licensing options”. Use the drop-down list to change the License Type to Single Use License. Click the ArcGIS Pro Advanced license and click OK.
...
- launch ArcGIS Pro.
- When ArcGIS Pro opens, under the Create a new project section, click the Blank project template.
- In the 'Create a New Project' window, for Name, type "PlayMapping".
- For Location, click the Browse... button to the right.
- In the 'Select a folder to store the project.' window, click Computer in the left column and click Desktop in the right column and click OK.
- In the 'Create a New Project' Window, click OK.
- Maximize the ArcGIS Pro application window.
Creating a New Map
A map is a project item used to display and work with geographic data in two dimensions. The first step to visualizing any data is creating a new map. The ribbon runs horizontally across the top of the ArcGIS Pro interface. Tools (buttons) are organized into tabs along the ribbon.
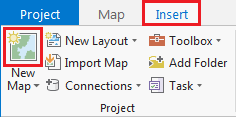
- On the ribbon, click the Insert tab.
- In the Project group, click the New Map button.
You will notice that a new map view opens in the main section of ArcGIS Pro.
The panel on the left side of ArcGIS Pro is called the Contents pane. After creating a new map, the Contents pane now displays the default Map title and automatically adds the Topographic basemap layer to the map.
The panel on the right side of ArcGIS Pro is called the Catalog pane. After creating the first map, a new Maps section has been added to the top of the Project tab within the Catalog pane. - In the Catalog pane, click the arrow to expand the Maps section.

Notice that there is a single map there, named "Map". Since most projects will have multiple maps, it is a good idea to name your maps with more descriptive titles. - In the Catalog pane, under the Maps section, right-click Map and select Rename.
- Type "PlayMapping" and hit Enter.
Saving a Project
Any time you create a new project item, such as a map or a layout, or any time you spend time adjusting the symbology of your map layers, it is a good idea to save your project.
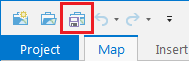
- Above the ribbon, on the Quick Access toolbar, click the Save button.
DATA MANAGEMENT
Start with HST.jpg
...