...
- By double-clicking the 'Raster' layer names and 'Tools' operations and typing the numbers, enter the following equation: "DEMft" - 30 * "FlowlineReclass" - 0.02 * (1500 - "FlowlineDistance") * ("FlowlineDistance" < 1500).
- For ‘Output raster’, rename the raster from “demft_raster” to “DEMRecon”.
- Ensure your Geoprocessing pane appears as shown below and click Run.

Notice that the DEMRecon layer looks very similar to the original DEMft. To better understand the difference between the two, you will actually calculate the difference between their corresponding values.
...
- At the top left of the Geoprocessing pane, click the Back button.
- In the search box, type "flow".
- Click the Flow Direction tool.
- For ‘Input surface raster’, select the FIL layer.
- For ‘Output flow direction raster’, rename the raster from “FlowDir_FiIL1” to “FDR”.
- Ensure your Geoprocessing pane appears as shown below and click Run.
...

The result may appear a bit strange at first, due to the color scheme assigned to each cardinal direction.

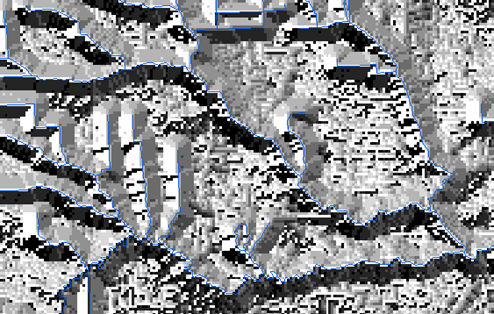
- Symbolize the FDR layer using Unique Values with a smooth black and white gradient for the Color Scheme.
You will notice the layer now looks more similar to a hillshade or 3D terrain visualization.
Calculating flow accumulation
Finally, you will calculate flow accumulation in each cell from the cells upstream, as illustrated below. Flow accumulation is dependent on the flow direction you calculated previously.

- At the top left of the Geoprocessing pane, click the Back button.
- In the search box, type "flow".
- Click the Flow Accumulation tool.
- For ‘Input flow direction raster’, select the FDR layer.
- For ‘Output accumulation raster’, rename the raster from “FlowAcc_FDR1” to “FAC”.
- Ensure your Geoprocessing pane appears as shown below and click Run.

- Turn off the Flowlines_StatePlane layer to better see the FAC layer.
- Right-click the FAC layer and click the Symbology.
- For ‘Symbology’, use drop-down menu to selectClassify.
- In the ‘Method’ drop-down menu to select Equal Interval.
- Use the ‘Classes’ drop-down menu to select8 classes.
- For ‘Class Breaks’, double-click the numbers in the Upper Value column and typethe following list: 100, 300, 1000, 3000, 10000, 30000, 100000. (Leave the final max value, 351408 as is.)
- Use the ‘Color Ramp’ drop-down menu to select the multipart color scheme.
...