...
Note: When transferring a file to another machine for editing, make sure you grab both the .aup file and the data folder; the .aup file alone contains no audio information.
3. Sample Rate: You will now need to set the sample rate for your project. If you are editing pre-existing audio, the first file you import into Audacity will set the sample rate. If you are going to make a new recording go to edit > preferences > quality (mac users: audacity > preferences > quality) set the Default Sample Rate to 44100 Hz and the Default Sample Format to 16-bit.
...
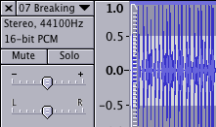
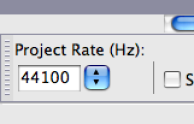
Your imported file should now be viewable in the Audacity screen. To play the track press the green play button in the upper left, or with the track highlighted press the spacebar. You will notice the sample rate and format of the imported track listed below the track title, this will match the project rate shown in the bottom left of the Audacity screen.
track sample rate project sample rate
6. Mixed Sample Rates: It is possible to have multiple audio tracks in audacity with sample rates that do not match.
...
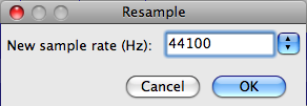
C. Finally, what if you need to copy a segment of audio from a 44100 Hz track and paste it into a 22050 Hz track? For this you will need to resample the lower rate track. To do so, highlight the track to resample by clicking anywhere on the track. Go to tracks > resample and select the target sample rate. Click Ok and Audacity will convert the track.
7. Recording an Audio File: Before you begin recording you will need to verify that the device you are going to use has been set as the recording device. Go to edit > preferences > devices (Mac users: audacity > preferences > devices).
Note: In older versions of audacity devices is labeled audio I/O
Make a selection from the devices drop down list under the recording section and click OK, you are now ready to make a test recording. Ex: in the DMC recording booth you will select "Duet USB" from the devices list. This selection corresponds to the pre-amplifier device use by the microphone.
8. Press the record button in the upper left of the Audacity screen. You can press pause at anytime, the recording will resume from where you left off, otherwise press stop and the track cursor will return to the beginning.
a. To test the track press play , if the recorded sound is faint or distorted you may need to adjust the input gain. Use the slider bar to adjust gain within Audacity, or adjust the line in volume on the peripheral equipment. To adjust the input volume on the Apogee Duet, press on the scroll wheel until the input you are using is selected, and then turn to adjust.
slider bar peripheral
...
4. Moving Audio: The time shift tool is used to reposition audio within the track. With the time shift tool selected hold left click > and move the cursor left/right. This moves the entire track regardless of any area you might have highlighted.
5 5. To move just a segment, you will first need to split the track. Position the selection tool at the point to split, go to edit > clip boundaries > split (cmd/ctrl+I). You can now use the time shift tool to move the newly detached segment independently.
...
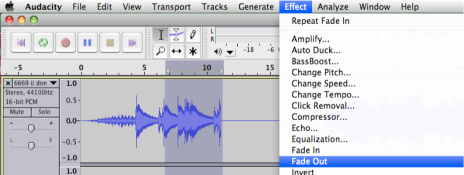
6. Effects : To create a more subtle transition between audio and silenced portions use fade-in and fade-out located under effect. Highlight the amount of audio you would like to use for fade out. Go to effects > fade out. Audacity will apply the effect over the duration of your chosen segment.
...
Using this same technique, you can amplify the volume of a segment, create a wah wah effect, reverse the audio, etc. Interesting results can be achieved through duplicating the segment into a new track (as described in 3 above) and applying separate effects to the copied pieces.
7. Converting Mono to Stereo: Recordings from monaural devices (such as the microphone in the DMC recording booth) will produce single channel audio tracks. To create a stereo pair, go to tracks > add new > stereo track.
...
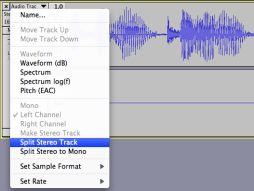
A. If you have unintentionally made a mono recording within a stereo track, you can split the left and right channels and delete the silent portion. Open the drop down menu next to the track title and choose split stereo track. The channels will now be separated and you can close the silent track.
8. Increasing Volume: To increase the volume of a quiet track the easiest method to use is the gain slider beneath the track name.
gain slider output meter
After making gain adjustments, play the track and keep your eye on the output meter, if the meter peaks out, it will leave red bars at the end. This means the track is too loud and will be distorted, adjust the gain back down until red no longer shows up in the output meter.
...
AIFF and WAV formats are uncompressed audio files, ideal for use in editing programs such as Final Cut Pro. MP3 and AAC are compressed formats suitable for importing into audio players such as iTunes.
Selecting options in the export window will let you set the quality of your export file type. Bit Rate: 128kbs is the standard setup for songs; you can't go lower than 64kbs if you want to preserve good quality. For narrations or talk shows you can't go lower than 32kbs, typically the setup is 64kbs. The lower the bit rate, the smaller the file size. When the file is encoded at 64bps, its size is approximately 0.5MB/minute. When the bit rate is doubled, the file size is almost doubled too.
A new window will pop up offering you the chance to fill out some track information. After you are done filling out this information click ok and your file will be converted.
...

