...
- In the ‘Layer Properties: MajorRoads’ window, click Cancel.
- In the Contents pane, double-click the County Schools layer name to open the 'Layer Properties' window.
- In the left menu, ensure the the Source tab is still selected and and expand the the Spatial Reference section.
Note that the spatial reference is in an Unknown Coordinate System, meaning that the coordinate system of this feature class has not been defined. In other words, ArcGIS does not know which coordinate system the data was created in and, therefore, will probably not be able to accurately line up this data layer with other data layers. Before you can reliably use this feature class, you will need to define its coordinate system and projection.
- In the ‘Layer Properties: County’ window, click Cancel.
- In the Contents pane, double-click the Schools layer to open the 'Layer Properties' window.
- In the left menu, ensure the Source tab is still selected and expand the Spatial Reference section.
Note that the Schools feature class uses the same geographic coordinate system as the MajorRoads feature class: GCS North American 1983. Even the general projection type is the same: Lambert Conformal Conic. However, its properties have been modified to be suitable for all of Texas, rather than just the South Central portion of Texas, so the Projected coordinate system name is now the Schools feature class uses the same geographic coordinate system as the MajorRoads feature class: GCS North American 1983. Even the general projection type is the same: Lambert Conformal Conic. However, its properties have been modified to be suitable for all of Texas, rather than just the South Central portion of Texas, so the Projected coordinate system name is now Texas Centric Mapping System/Lambert Conformal. The Texas Centric Mapping System is an example of a statewide projection that is suitable for mapping the entire state. Statewide projections are commonly developed for large or elongated states, such as Alaska, California, Michigan, and Texas, which would otherwise be divided into numerous small bands using the State Plane system.
- In the ‘Layer Properties: Schools’ window, click Cancel.
The geographic coordinate system and projection for each of the three feature classes are summarized in the table below.
Layer | Geographic Coordinate System | Projected Coordinate System |
MajorRoads | NAD 1983 | State Plane Texas South Central |
County | Undefined | Undefined |
Schools | NAD 1983 | Texas Centric Mapping System |
Displaying Undefined Layers
You will now see what happens when you attempt to add an undefined layer to ArcGIS. The data frame, or display, takes on the coordinate system and projection of the first layer added to it. In this case, since the MajorRoads layer was the first layer added, the data frame will take on the State Plane Texas South Central projection. To verify this, you will check the coordinate system of the data frame.
- In the Contents pane, right-click on Map and select Properties.
- In the menu on the left, select Coordinate Systems.
Notice that, indeed, the State Plane Texas South Central projection is listed.
- In the ‘Map Properties: Map’ window, click Cancel.
- In the Contents pane, right-click on the MajorRoads layer and select Zoom to Layer.
Notice that both the MajorRoads layer and the Schools layer appear to line up properly, even though they have different projections. This is because ArcGIS is able to perform “on-the-fly” projection, as long as the coordinate systems of both layers are defined. On-the-fly projection means that the Schools layer is being superficially displayed in the State Plane Texas South Central projection of the data frame, based on calculations performed by ArcGIS; however, the projection of the Schools feature class itself has not been altered from the Texas Centric Mapping System projection.
Though not recommended, on-the-fly projection may be used whenever a visual display of data is all that is required. On-the-fly projection should never be used when attempting to perform calculations between two layers involving measurements of distance or area, as these measurements are most accurate when all data layers are in the same projection.
Now you will see how ArcGIS handles undefined layers.
- In the Contents pane, right-click on the County layer and select Zoom to Layer.
...
- Cancel.
- In the Contents pane, double-click the County layer name to open the 'Layer Properties' window.
- In the left menu, ensure the Source tab is still selected and expand the Spatial Reference section.
Note that the spatial reference is in an Unknown Coordinate System, meaning that the coordinate system of this feature class has not been defined. In other words, ArcGIS does not know which coordinate system the data was created in and, therefore, will probably not be able to accurately line up this data layer with other data layers. Before you can reliably use this feature class, you will need to define its coordinate system and projection.
- In the ‘Layer Properties: County’ window, click Cancel.
The geographic coordinate system and projection for each of the three feature classes are summarized in the table below.
Layer | Geographic Coordinate System | Projected Coordinate System |
MajorRoads | NAD 1983 | State Plane Texas South Central |
| Schools | NAD 1983 | Texas Centric Mapping System |
County | Undefined | Undefined |
Displaying Undefined Layers
You will now see what happens when you attempt to add an undefined layer to ArcGIS. The data frame, or display, takes on the coordinate system and projection of the first layer added to it. In this case, since the MajorRoads layer was the first layer added, the data frame will take on the State Plane Texas South Central projection. To verify this, you will check the coordinate system of the data frame.
- At the top of the Contents pane, right-click Map and select Properties.
- In the menu on the left, select Coordinate Systems.
Notice that, indeed, the State Plane Texas South Central projection is listed.
- In the ‘Map Properties: Map’ window, click Cancel.
- In the Contents pane, right-click on the MajorRoads layer and select Zoom to Layer.
Notice that both the MajorRoads layer and the Schools layer appear to line up properly, even though they have different projections. This is because ArcGIS is able to perform “on-the-fly” projection, as long as the coordinate systems of both layers are defined. On-the-fly projection means that the Schools layer is being superficially displayed in the State Plane Texas South Central projection of the data frame, based on calculations performed by ArcGIS; however, the projection of the Schools feature class itself has not been altered from the Texas Centric Mapping System projection.
Though not recommended, on-the-fly projection may be used whenever a visual display of data is all that is required. On-the-fly projection should never be used when attempting to perform calculations between two layers involving measurements of distance or area, as these measurements are most accurate when all data layers are in the same projection.
Now you will see how ArcGIS handles undefined layers.
- In the Contents pane, right-click on the County layer and select Zoom to Layer.
Notice that the County layer does not appear on where it should on the Map. If you zoom out enough, you will see that it is in the middle of the Pacific Ocean This is because ArcGIS does not know where to locate the County layer relative to the other layers, since it is not defined. Instead, ArcGIS does the best it can and treats the coordinates of the County layer as if they were in Texas South Central State Plane coordinates, even though they are not.
- In the Contents pane, right-click on the MajorRoads layer and select Zoom to Layer.
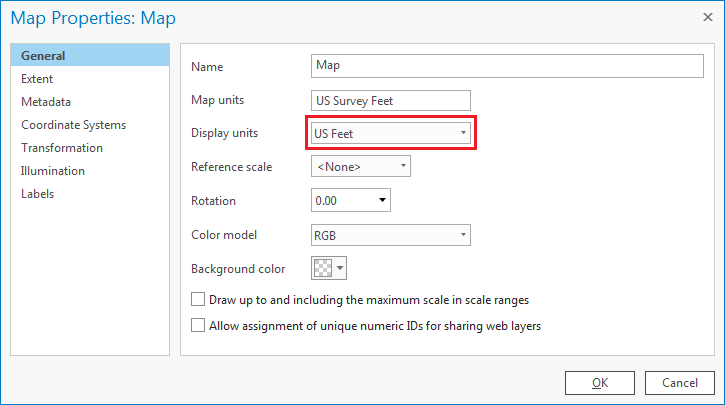
- Double-click Map to open the 'Map Properties' window.
- Ensure the General tab is selected.
Notice that the 'Map units' are in feet. We will make the display units match the map units.
- Use the 'Display units' drop-down menu to select US Feet and click OK.
Notice when you move your cursor around the map display, the coordinates listed in the bottom right of the window are similar to those shown below, indicating units of millions of feet.
...
Now that you know the geographic coordinate system of the County feature class, you will need to define it so that ArcGIS knows, as well. Please note that the geographic coordinate system and projection must be defined based on metadata provided from the data source itself. If you cannot locate such metadata, you should contact the provider of the data for such information. You cannot simply guess or decide which projection to use when defining the data (though, occasionally, you may have to resort to educated guesses and trial-and-error when metadata absolutely cannot be tracked down.)be tracked down.)
- On the ribbon, click the Analysis tab.
- In the Analysis paneGeoprocessing group, click the Tools button .In to open the Geoprocessing pane to on the right.
- In of the Map Window, in the Find Tools search bar, type ‘Define Projection.’ Select Define Projection (Data Management Tools). "define projection".
- Click the Define Projection tool to open it.
- Use In the ‘Input Dataset or Feature Class’ drop-down menu , to select County.
- Click the Atlas For the 'Coordinate System', click the Select coordinate system button to the right of the Coordinate system drop-down menu.
- In the Coordinate System window, expand Geographic coordinate system > North America > USA and territories > .
- Click NAD 1983 (2011). Click and click OK.
- Ensure your Geoprocessing pane looks like this pane and select Run.
...
- appears as shown below.
- At the bottom of the Geoprocessing pan, click Run at the bottom.
Notice that the County layer has been projected onto the correct location of Harris County.
...
- In the Catalog pane, rightdouble-click the County layer and select Properties.
- Select the Source tab and expand Spatial Reference.
...
- In the ‘Layer Properties: County’ window, click Cancel.
Projecting Data
If you are only interested in creating a visual map, as you have done now, then relying upon on-the-fly projection will suffice. If, on the other hand, you are interested in performing any sort of calculations between the layers that rely upon distance, area, or spatial overlap, then it is recommended that you use the same projection for all layers. In addition, you can only measure linear distances in a projected coordinate system, not in a geographic coordinate system, so the County layer would need to be projected anyway, before any sort of measurements could be made.
Selecting a Map Projection
Now that all of your data has been defined, you can transform all the feature classes into a common projection. Unlike the process of defining data, where there is only one projection you can use (the one specified in the metadata), when projecting data, you can select whichever projection best suites your particular combination of data and tasks at hand. Since your data focuses on the Harris County region, the State Plane Texas South Central projection would be suitable.
Determining which layers to project
The State Plane Texas South Central projection has been selected for the final map projection. All layers that are not currently in that projection will need to be re-projected, such as the County and Schools feature classes. All layers that are already in the final projection can be left as is and do not need to be re-projected, such as the MajorRoads feature class.
Layer | Geographic Coordinate System | Projected Coordinate System | Matches Final Projection? |
MajorRoads | NAD 1983 | State Plane Texas South Central | YesCounty |
| Schools | NAD 1983 | NoneTexas Centric Mapping System | No |
SchoolsCounty | NAD 1983 | Texas Centric Mapping SystemNone | No |
Projecting Layers
- In At the top of the Geoprocessing pane, click the Back arrow.
- In the Find Tools search bar, type ‘Project’ ‘project’. Select Project (Data Management Tools)
- Click the Project tool.
- For the 'Input Dataset or Feature Class', use the drop-down menu , to select the County layer.
Note that the output dataset is saved to the same geodatabase as the input dataset and the name of the output feature class has the suffix “_Project” tacked onto the end of the original input feature class name.
- Next to the For ‘Output Coordinate System’, use the drop-down menu , click the Atlas button.to select the MajorRoads layer.
Notice that the NAD 1983 State Plane Texas South Central projection has been imported from the MajorRoads layer. While you could have again navigated to the projectionyourselfWhile you could click navigate to or search for the State Plane Texas South Central coordinate system yourself, in this case, you know that the same coordinate system is already used by the MajorRoads layer. In such an instance, it is easier to import the coordinate system from another layer, especially if you are not familiar with where the coordinate system of interest is stored.
...
.
- Ensure that your Geoprocessing pane appears as shown below and select Run click Run.
...
When previously defining a layer, you simply updated the metadata attached to that layer to include the known coordinate system and projection. When projecting a layer, you have actually created a second copy of the data in the new coordinate system. The original layer stays in the native coordinate system and the new layer is converted to the desired coordinate system.
...