...
- At the top of the Geoprocessing pane, click the Back arrow button.
- Collapse the Spatial Analyst Tools toolbox.
- Click the 3D Analyst Tools toolbox > Data Management toolset > TIN toolset > Create TIN tool.
- For ‘Output TIN’, type “TIN_Rain”.
- For ‘Coordinate System’, use the drop-down menu to select the Rainfall feature class, which will import Houses layer, to ensure that the interpolated data will be in the same coordinate system used to map the original latitude and longitude data of the rain gaugesas the Houses layer, which contains the points at which we need to extract the interpolated values.
As you will see in the warning, it is recommended to only create a TIN in a projected coordinate system, rather than a geographic coordinates system. The process of projecting a layer from one coordinate system to another is outside the scope of this course, but is covered in the Introduction to Coordinate Systems and Projections course.
...
Now you have explored four methods for interpolating the rainfall data, so you will turn off the layers you have generated in this 'Point Interpolation' section.
- In the Contents pane, uncheck all layers, except for the Topographic basemap layer.
...
You will now try interpolating the Hurricane line feature class using the same TIN -based method you just used to interpolate the rainfall point data. Recall that the Hurricane feature class contains a Windspeed field in its attribute table, which tells you the peak average wind speed along each line at the time the hurricane landed.
- In the Contents pane, check the Hurricane layer to make it visible.
- At the top of the Geoprocessing pane, click the Back arrow button..
- Within the 3D Analyst Tools toolbox, collapse the Conversion toolset.
- Within the In ArcToolbox navigate to 3D Analyst Tools toolbox > Data Management toolset > TIN > Create TIN, click the Data Management toolset.
- The TIN toolset should already be expanded, but, if not, click the TIN toolset.
- Click the Create TIN tool.
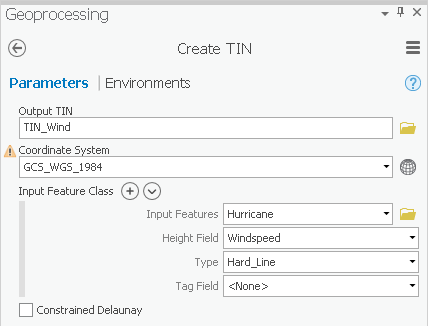
- For ‘Output TIN’, type “TIN_Wind”.
- For ‘Coordinate System’, use the drop-down menu to select the Houses layer.
- For ‘Input Features’, use the Use the ‘Input Feature’ drop-down box menu to select the Hurricane feature class.
- Use the For ‘Height Field’, use the drop-down box menu to select the Windspeed field as shown below.
- Use the ‘Coordinate System’ drop-down box to select the Houses layer.
- Ensure that your 'Create TIN' tool Parameters tab appears as shown below and click Run.
Again, you need to convert the TIN to a raster, so that it is comparable to the other interpolation layers.
...
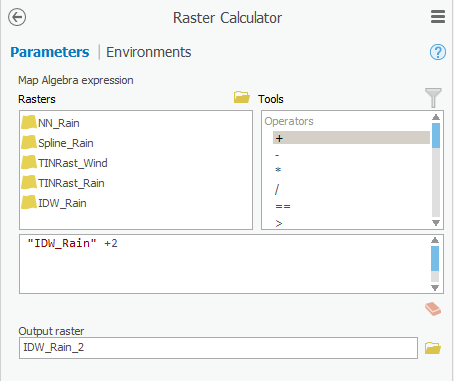
- In the Geoprocessing pane, in the Spatial Analyst Tools toolbox, click the Map Algebra toolset > Raster Calculator tool.
- Under ’Rasters’, double-click the IDW_Rain layer.
- Under ‘Operators’, click the + operator.
- For ‘Output raster’, rename the exported raster from “idw_rain_ras” to “IDW“IDW_Rain_2”2”.
- Ensure that your 'Raster Calculator' tool Parameters tab appears as shown below and click Run.
...