HJlib provides two jars for JDK8 and JDK7 compatibility. Installation instructions for both these are similar, except that the HJlib jar file needs to be different.
JDK8 installation instructions are mentioned first followed by instructions for JDK7.
| Table of Contents | ||
|---|---|---|
|
...
support for multiple runtimes. In this article, we will discuss how to set up the JDK11 compatible cooperative runtime.
Instructions on the download and set up of the thread-blocking runtime is available in another article.
Here are the steps for running HJlib on Java 8 11 using an IDE:
Step 1: Java 8 11 Installation
You will also need a Java 8 11 installation on your machine and have your JAVA_HOME and PATH point to the new installation. Java 8 11 can be downloaded and installed from the Oracle website.
For e.g., I have the following on my Mac machine's .bash_profile:
JAVA8JAVA11_HOME=/Library/Java/JavaVirtualMachines/jdk1jdk11.80.013.jdk/Contents/Home
export JAVA_HOME=${JAVA8JAVA11_HOME}
export PATH=$JAVA_HOME/bin:$PATH
On Windows the environment variables have to be set up differently, refer to this stackoverflow question to see how it can be done.
Step 2: HJlib JAR File
Download the JDK8 JDK11 compatible HJlib jar file and save it to a local directory.
...
We show how to set up a simple Maven project with a HJlib HelloWorld program in IntelliJ. Similar steps can be followed for other IDEs like Eclipse.
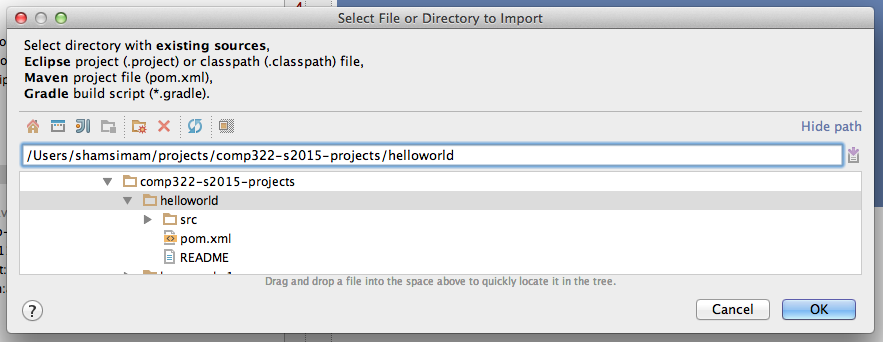
First, download the helloworld.zip file and unzip it into a directory of your choice (e.g. /Users/shamsimam/projects/comp322-s2015-projects/helloworld).
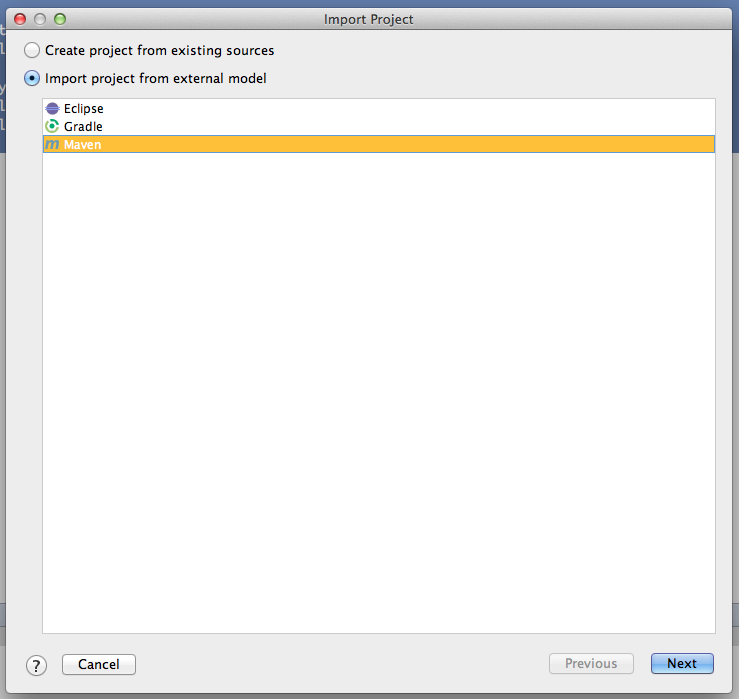
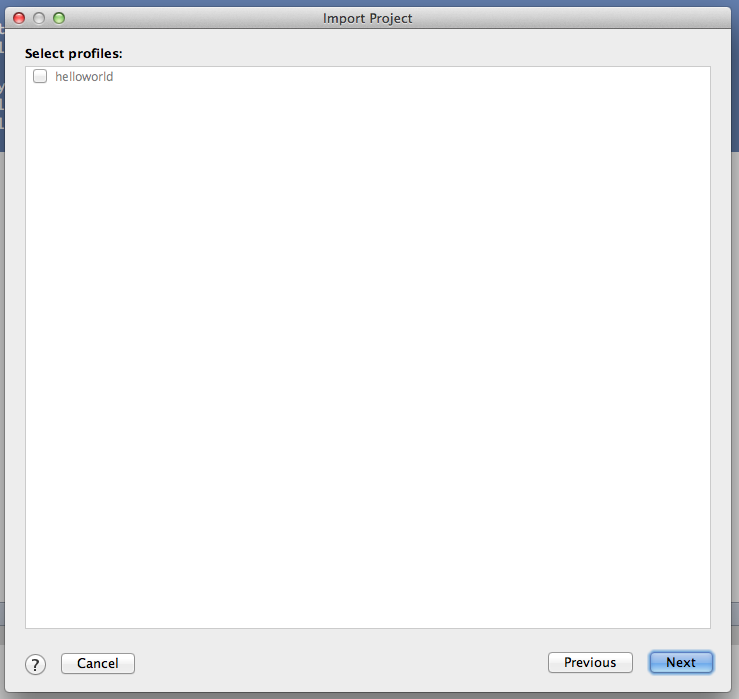
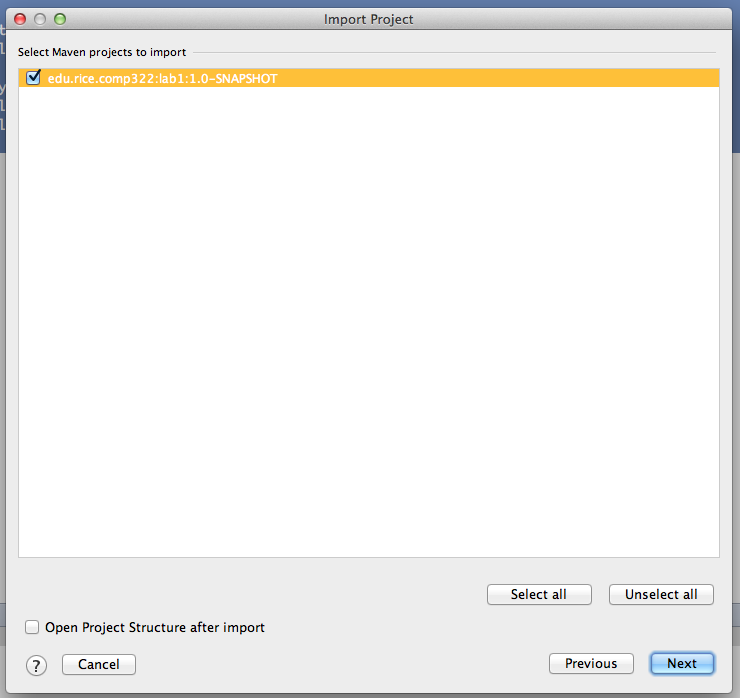
Next, import this project into IntelliJ create a new project using the File -> New Import Project Menumenu option.
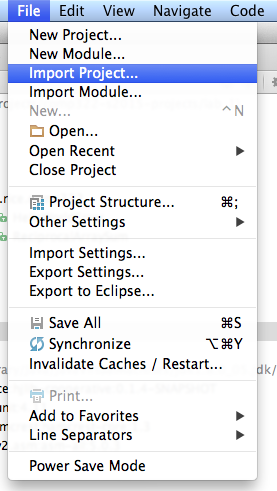
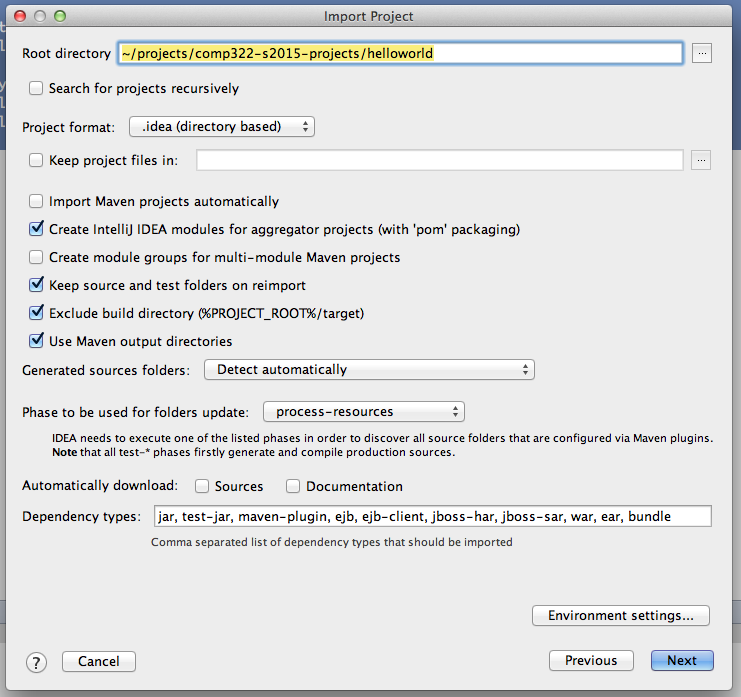
This should show a popup window as followsthe following series of popups:

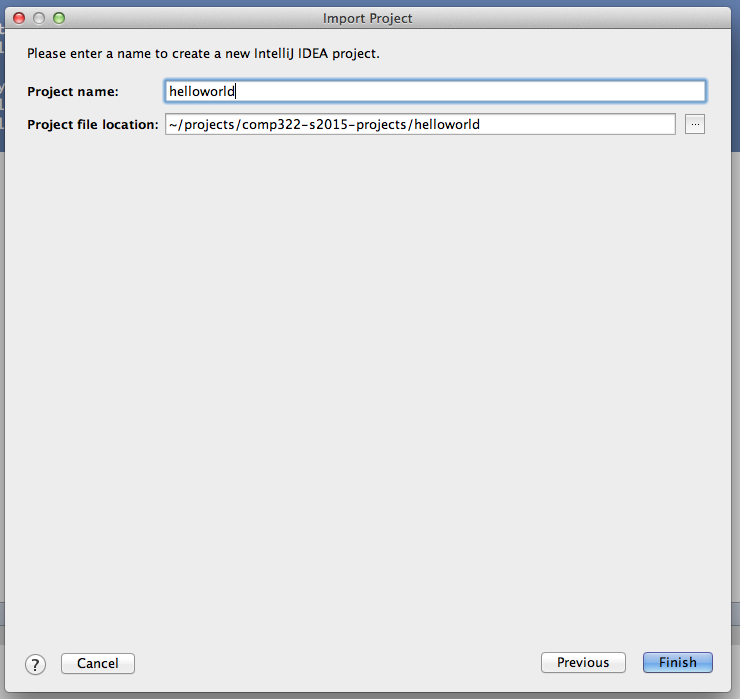
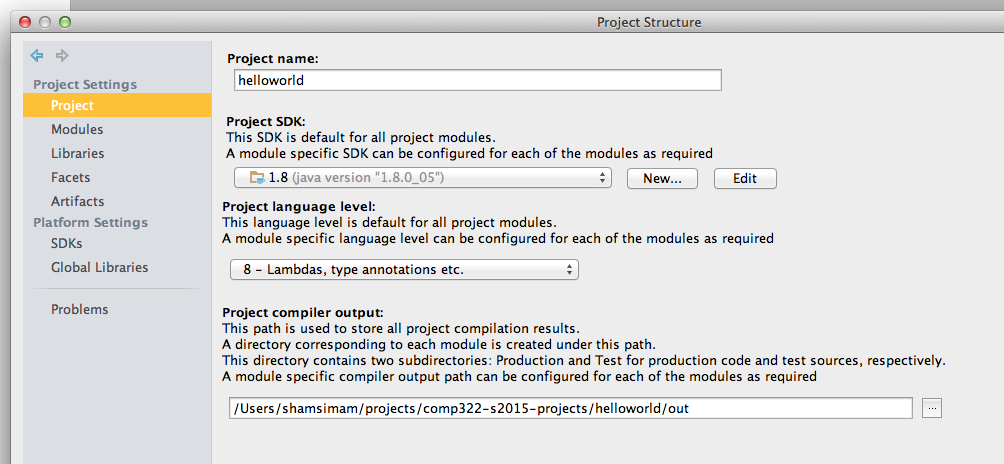
Now, choose a name for your project and a directory location for the project. Remember to select the Java 8 SDK and click Next:

On the next window click Finish, we do not need dependencies on any other technologies.


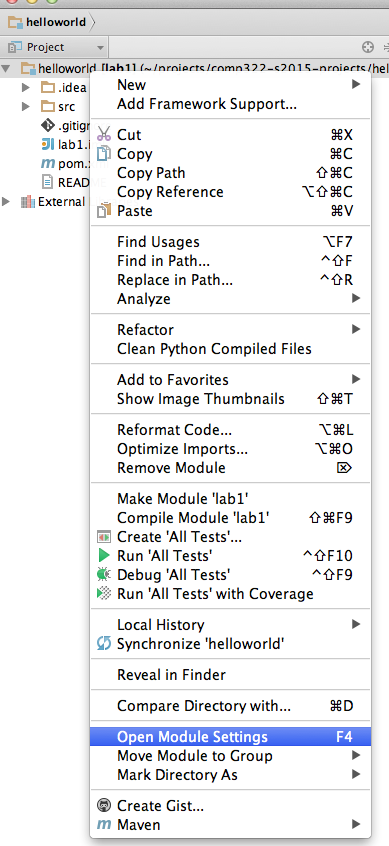
 We now need to add the previously downloaded HJlib jar from Step 2 as a dependency to this project. We need to do this from the module settings.
First enable the project view, befretrying then right-clicking on the root folder to change the module settings.


We will be using Java 8 lambdas while developing with HJlib, so we need to ensure the language level settings in the project:

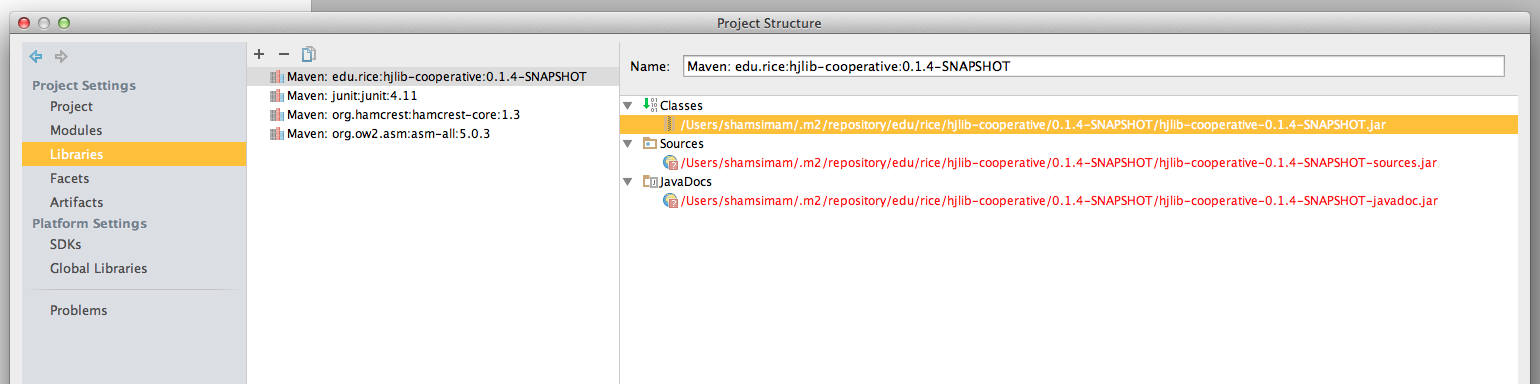
NextNotice, we need to add the library dependencydependencies have already been resolved thanks to maven:

Clicking on the plus icon and selecting a Java library allows us to choose the location for the jar file:

Once added, we can click 'Apply' to save our changes.
Ensure that habanero-java-lib has been added as a dependency to the module:

After confirming, click "OK" to save your changes.
We are now ready to write our first HJ application using HJlib.
To create a java file, right click on the 'src' folder and select New -> Java Class.
Use 'HelloWorld' as the name of the class and type in the sample program:

Here is the source code:
...
You will need to note the path of the HJlib jar file as we will need it to be able to run the HelloWorld.java program from IntelliJ.
On my machine it is at /Users/shamsimam/.m2/repository/edu/rice/hjlib-cooperative/0.1.4-SNAPSHOT/hjlib-cooperative-0.1.4-SNAPSHOT.jar
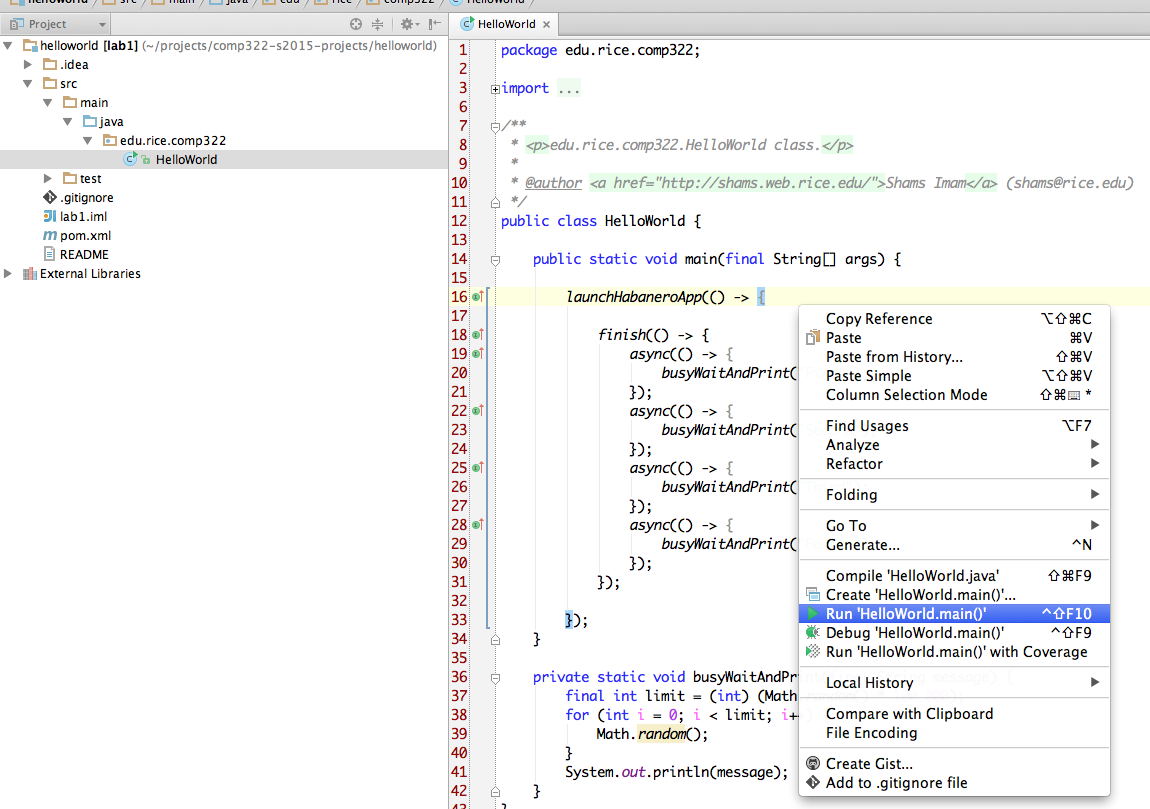
Open the HelloWorld.java file in the editor and attempt to run it by right clicking on it and choosing the Run option:
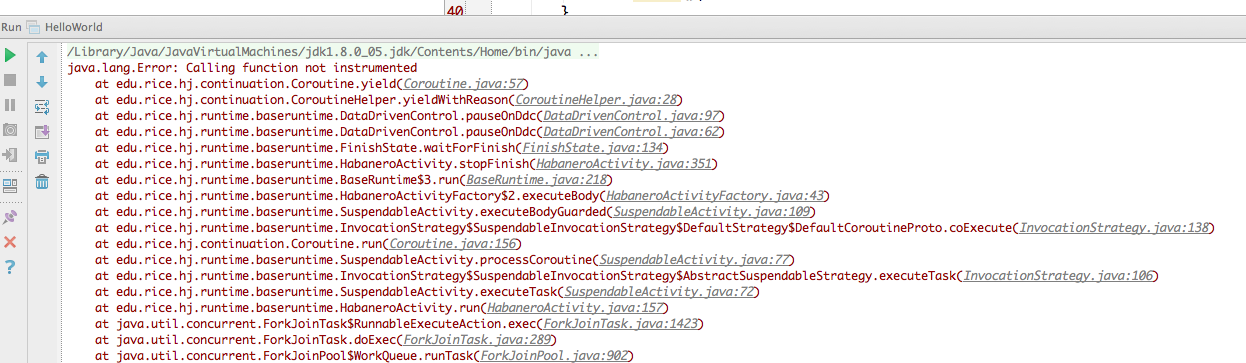
Since we are running HelloWorld.java without configuring the javaagent option, it is likely to intermittently fail with an error as follows: java.lang.Error: Calling function not instrumented
Or the following error:
Error occurred during initialization of VMagent library failed to init: instrument
To fix this error, we need to correct set up the javagent JVM option before attempting to run HelloWorld.java.
Java agents provide services that allow Java programming language agents to instrument programs running on the JVM. To run HJlib programs under the cooperative runtime we need to configure the JVM to use agents available in the HJlib jar. An agent is started by adding this option to the command-line:
-javaagent:jarpath[=options]
We need to configure this in IntelliJ to be able to successfully run HJlib programs. Below is an image of what the configuration looks like after editing the run configuration:


Now we can run the program by clicking on the green play button.
Now we can run this program by right clicking on the HelloWorld item on the project explorer and clicking run.

Running the file on my machine produces the following output for example:

JDK7 compatible HJlib
A Java 7 compatible jar is available for download here: habanero-java-lib-0.1.2-SNAPSHOT-jdk7.jar
An IntelliJ project can be set up similar to the above instructions and the language level set to Java 7.

Code examples of HJlib with JDK7 compatibility are available here: examples directory