HJlib provides two jars for JDK8 and JDK7 compatibility. Installation instructions for both these are similar, except that the HJlib jar file needs to be different.
JDK8 installation instructions are mentioned first followed by instructions for JDK7.
JDK8 compatible HJlib
Here are the steps for running HJlib on Java 8 using an IDE:
Step 1: Java 8 Installation
You will also need a Java 8 installation on your machine and have your JAVA_HOME and PATH point to the new installation. Java 8 can be downloaded and installed from the Oracle website.
For e.g., I have the following on my Mac machine's .bash_profile:
JAVA8_HOME=/Library/Java/JavaVirtualMachines/jdk1.8.0.jdk/Contents/Home
export JAVA_HOME=${JAVA8_HOME}
export PATH=$JAVA_HOME/bin:$PATH
On Windows the environment variables have to be set up differently, refer to this stackoverflow question to see how it can be done.
Step 2: HJlib JAR File
Download the JDK8 compatible HJlib jar file and save it to a local directory.
Step 3: IDE like IntelliJ or Eclipse
HJlib is a simple Java library (jar file) and can be used in any Java project. As such a simple text editor can be used to write programs that use HJlib.
However, we recommend using an IDE like IntelliJ to do the Java development using HJlib in the labs and assignments.
A free version of IntelliJ (Community Edition) can be downloaded and installed from the Jetbrains website.
Step 4: Your first project
We show how to set up a simple project with a HJlib HelloWorld program in IntelliJ. Similar steps can be followed for other IDEs like Eclipse.
First, create a new project using the File -> New Project Menu. This should show a popup window as follows:
Now, choose a name for your project and a directory location for the project. Remember to select the Java 8 SDK and click Next:
On the next window click Finish, we do not need dependencies on any other technologies.
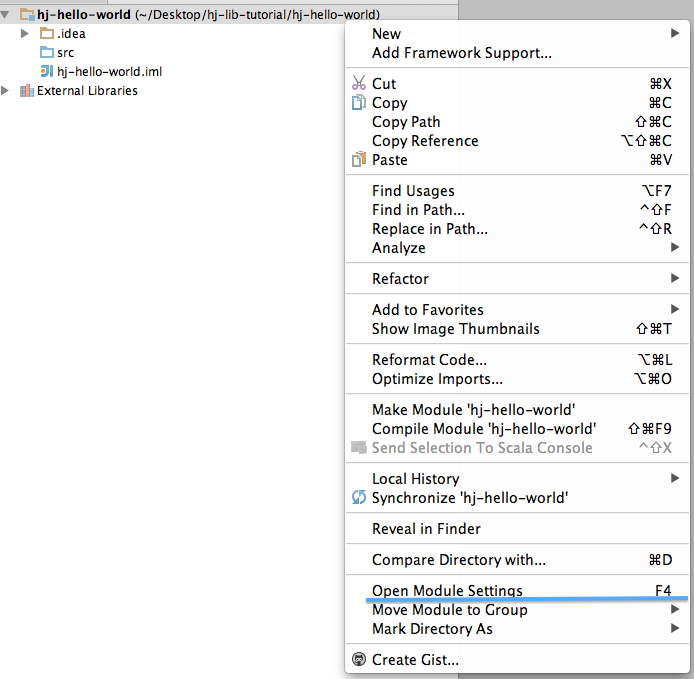
We now need to add the previously downloaded HJlib jar from Step 2 as a dependency to this project. We need to do this from the module settings.
First enable the project view, befretrying to change the module settings.
We will be using Java 8 lambdas while developing with HJlib, so we need to ensure the language level settings in the project:
Next, we need to add the library dependency:
Clicking on the plus icon and selecting a Java library allows us to choose the location for the jar file:
Once added, we can click 'Apply' to save our changes.
Ensure that habanero-java-lib has been added as a dependency to the module:
After confirming, click "OK" to save your changes.
We are now ready to write our first HJ application using HJlib.
To create a java file, right click on the 'src' folder and select New -> Java Class.
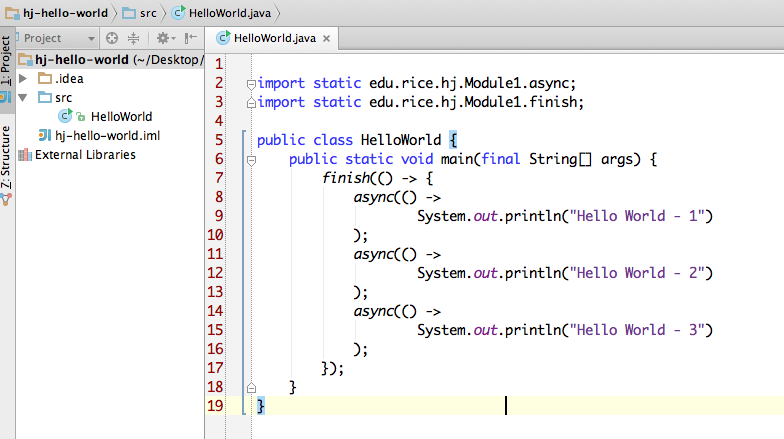
Use 'HelloWorld' as the name of the class and type in the sample program:
Here is the source code:
import static edu.rice.hj.Module1.async;
import static edu.rice.hj.Module1.finish;

public class HelloWorld {
    public static void main(final String[] args) {
        finish(() -> {
            async(() ->
                    System.out.println("Hello World - 1")
            );
            async(() ->
                    System.out.println("Hello World - 2")
            );
            async(() ->
                    System.out.println("Hello World - 3")
            );
        });
    }
}
Now we can run this program by right clicking on the HelloWorld item on the project explorer and clicking run.
Running the file on my machine produces the following output for example:
JDK7 compatible HJlib
A Java 7 compatible jar is available for download here: habanero-java-lib-0.1.2-SNAPSHOT-jdk7.jar
An IntelliJ project can be set up similar to the above instructions and the language level set to Java 7.
Code examples of HJlib with JDK7 compatibility are available here: examples directory


