Scanning Over-sized Documents
Note:
- For the scanner GT-15000 on station 13, use Image Capture since Epson Scan 2 is not available for this scanner.
- For the scanner GT-2000 on station 4, use either Image Capture or Epson Scan 2.
- Make sure the Epson scanner is turned on. The power button can be located on the bottom left of the front of the machine.
- Lift the cover of the scanner and place your document face down on the glass. Make sure to align the top left corner of your document to the aligning point
- Epson Scan 2
- Double click the Epson Scan 2 icon
- in the
- dock.
- For documents, use these settings:
- Mode - Document Mode
- Image Type - Color, Grayscale, or Black & White, depending on the document
- Resolution - For a photo to be used in Powerpoint or Web, use 300dpi. For a photo for archival purposes or book publications, use 1200dpi.
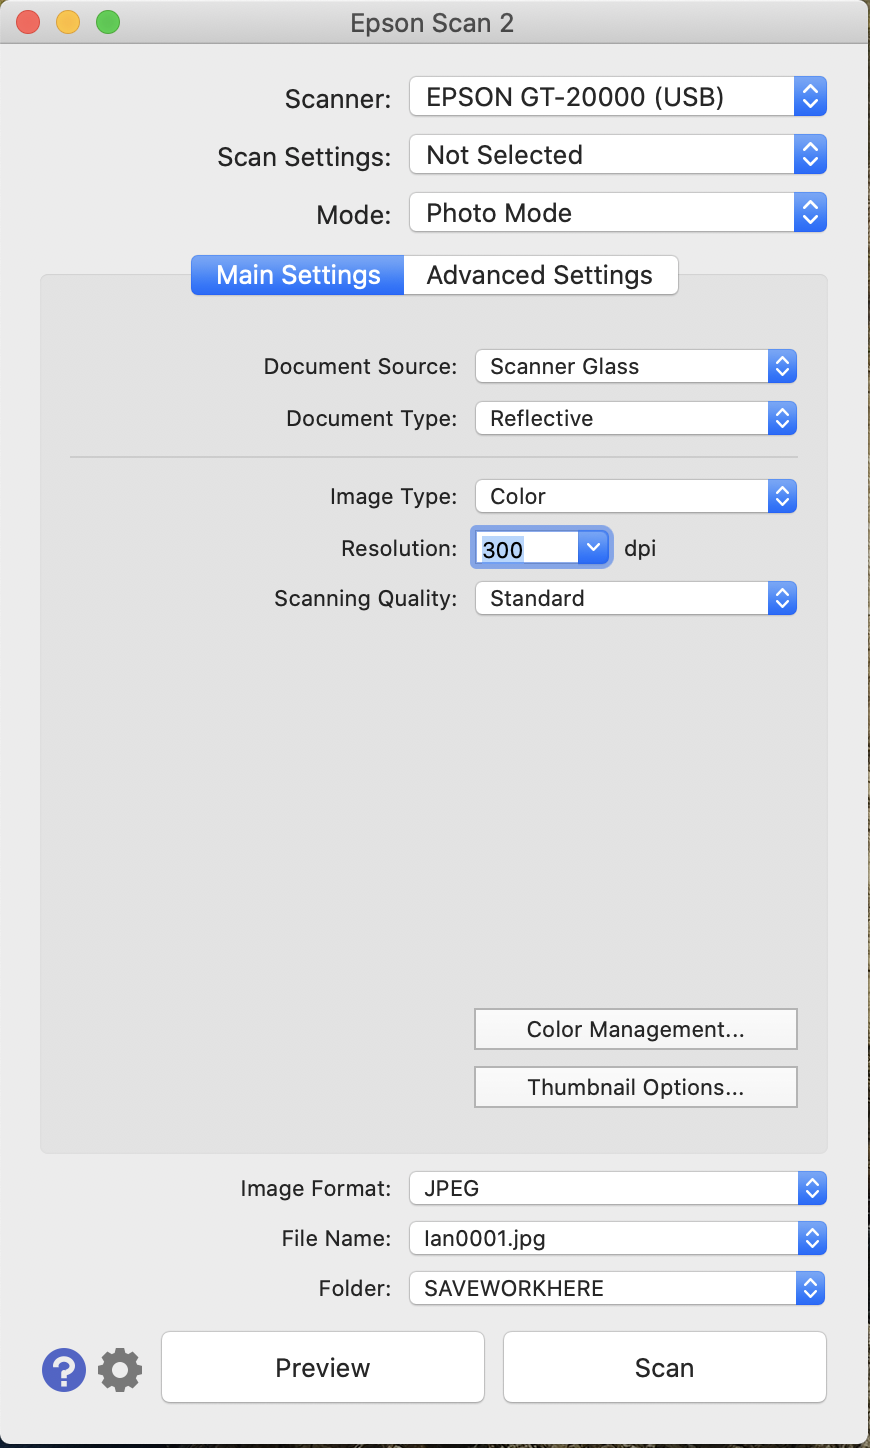
- For photos, use these settings:
- Mode - Photo Mode
- Document type - Reflective
- Image type - Color, Grayscale, or Black & white, depending on the photo
- Resolution - For a photo to be used in Powerpoint or Web, use 300dpi. For a photo for archival purposes or book publications, use 1200dpi.
- Double check these settings:
- File Location – Other: SAVEWORKHERE
- Image Format – For a photo to be used in Powerpoint or Web, use JPEG. For a photo for archival purposes or book publications, use TIFF.
- Click Preview to see image before scanning. If you wish to scan only part of the photo, drag your cursor to create a selection box around the area you want.
- Click Scan.
- Image Capture
- Double click the Image Capture icon in the dock
- Kind
- text - books or documents without images/figures
- Black&white - books or documents with black and white images/figures
- Color - photos or anything with colored contents
- Other settings - refer to Step 3 for Epson Scan 2.