Instructions
- Step 1: Prepare to checkout the lab_1 project from subversion
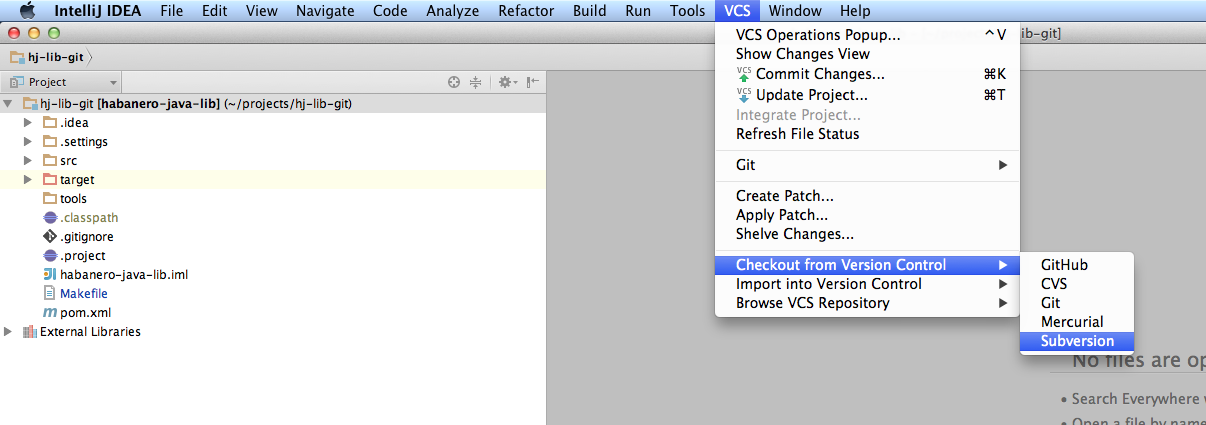
- Step 2: Use the "+" button to add the repository: https://svn.rice.edu/r/comp322/turnin/S15/NETID/lab_1/

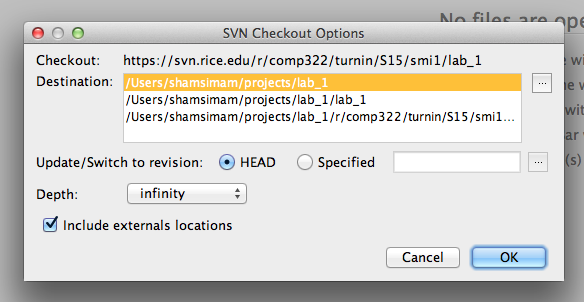
- Step 3: Confirm the directory where the directory where the project will be downloaded to.
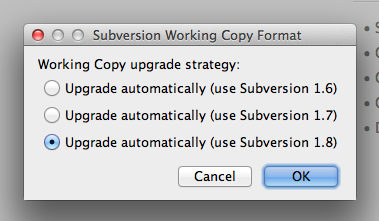
- Step 4: Confirm the subversion version to use for the directory format.
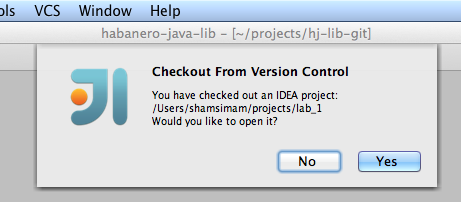
- Step 5: After the project is downloaded successfully, confirm to open the project.
- Step 6: Enable Auto-Import for this Maven project (lab_1).

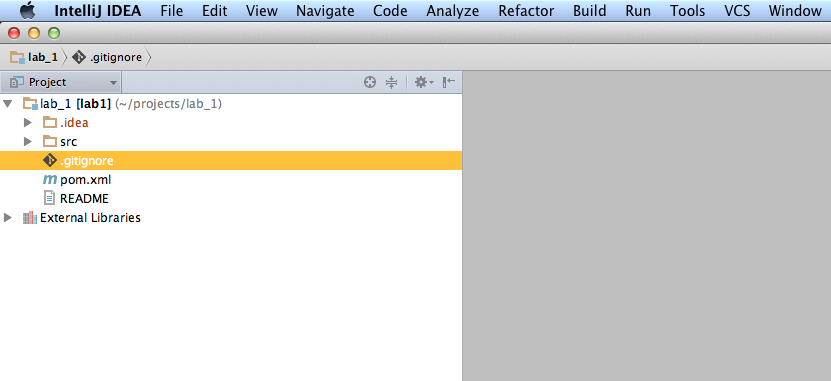
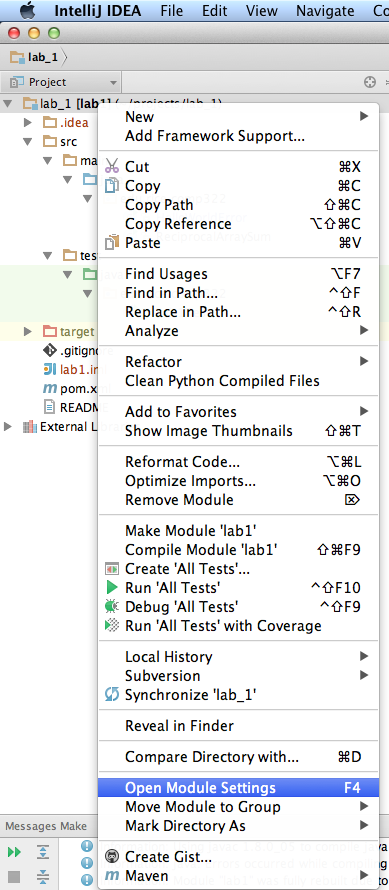
- Step 7: Initial directory layout of the project.
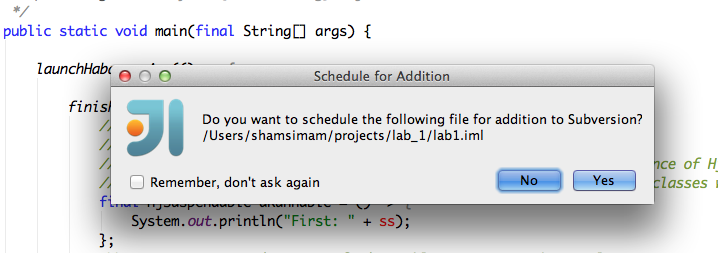
- Step 8: Click on "NO" when a popup shows up asking you whether you want to add an *.iml file to subversion.
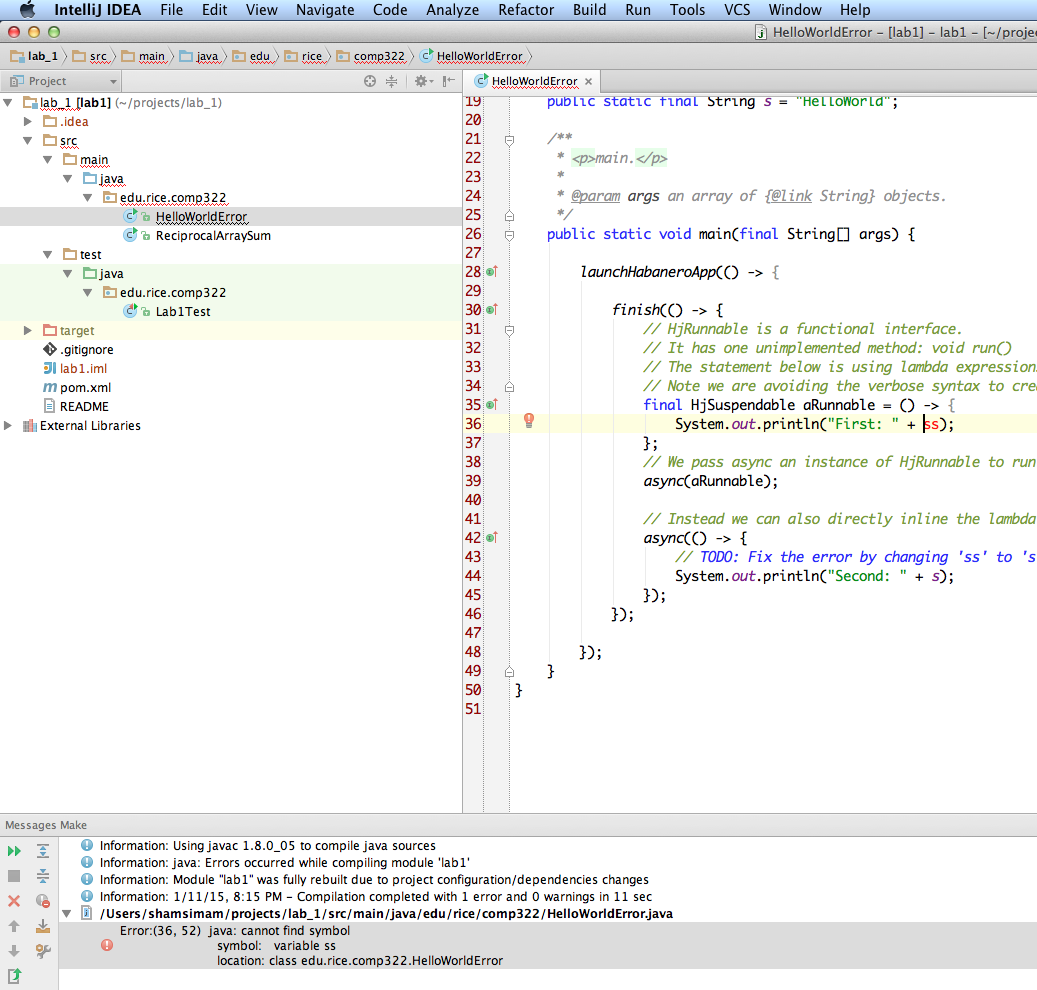
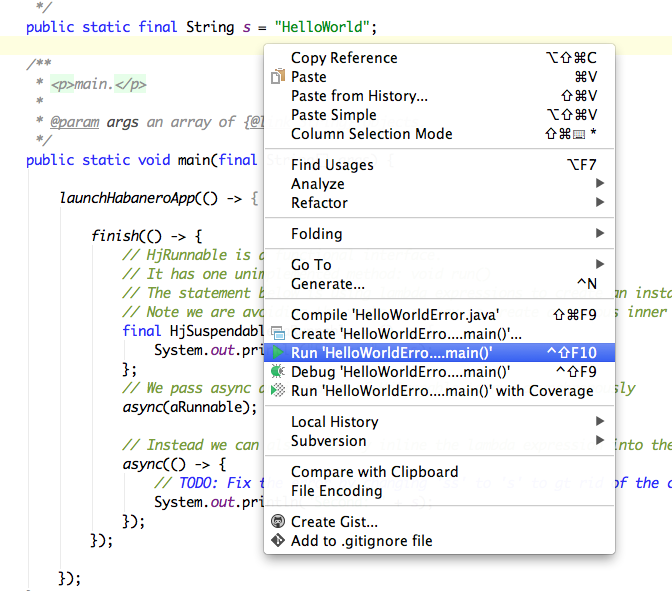
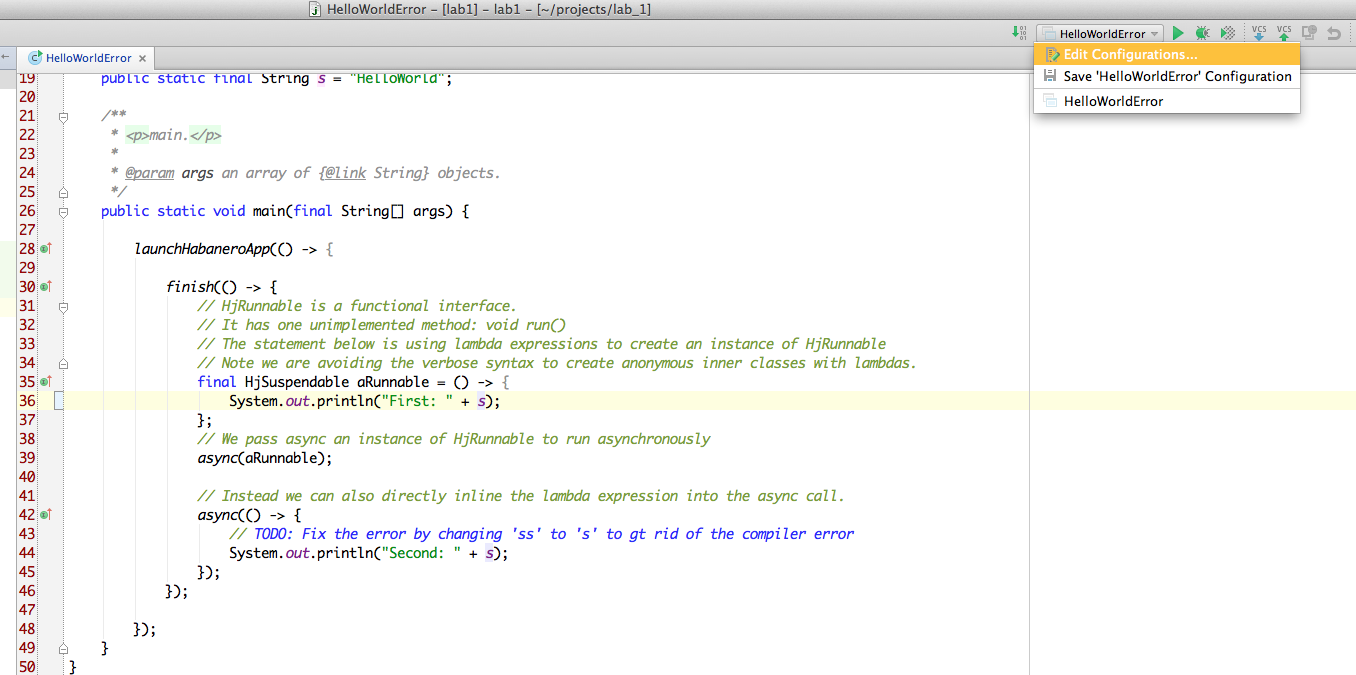
- Step 9: Open the HelloWorldError.java file by double clicking on it. Fix the error by editing the "ss" variable.
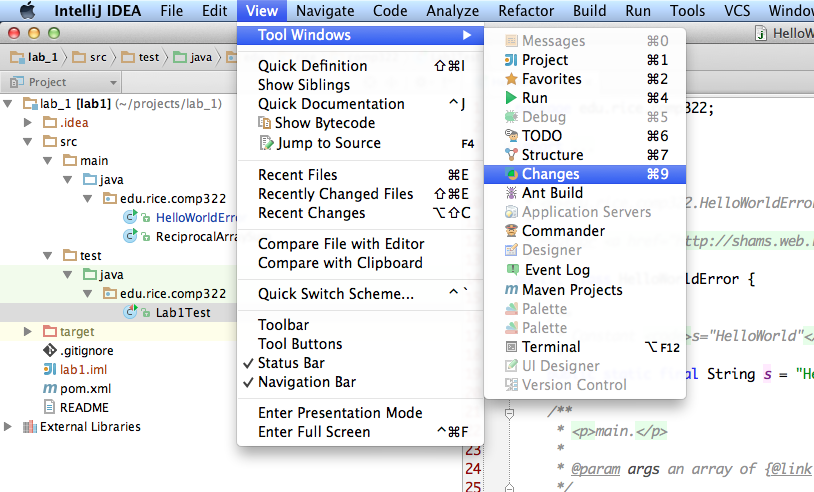
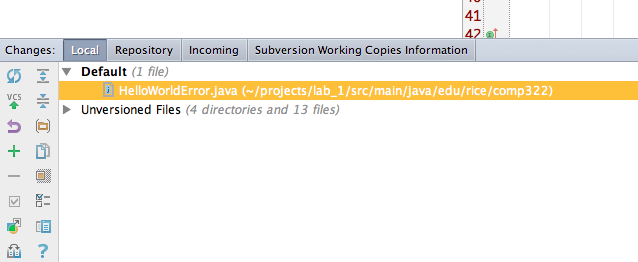
- Step 10: Open the "Changes View" so that you can see your edits.
- Step 11: The changes view will show you the files you have edited.
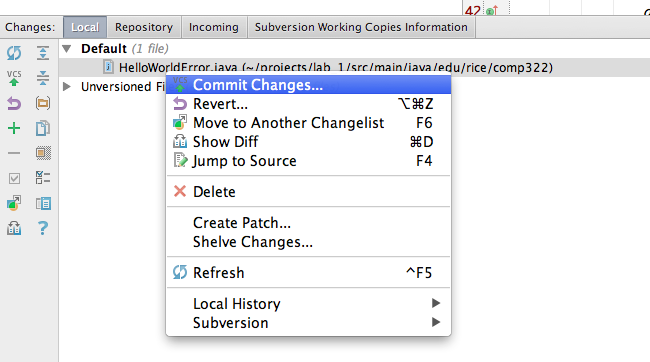
- Step 12: Submit your changes to the subversion repository by committing the changed files (right-clicking on the Default or HelloWorldError.java file in the Changes view).
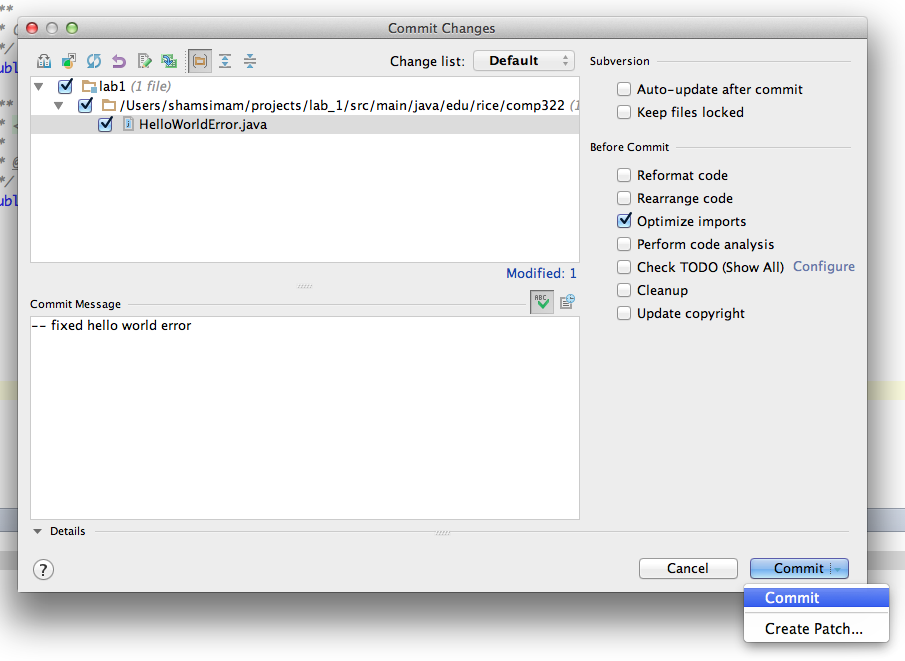
- Step 13: Add a commit message and commit the file.
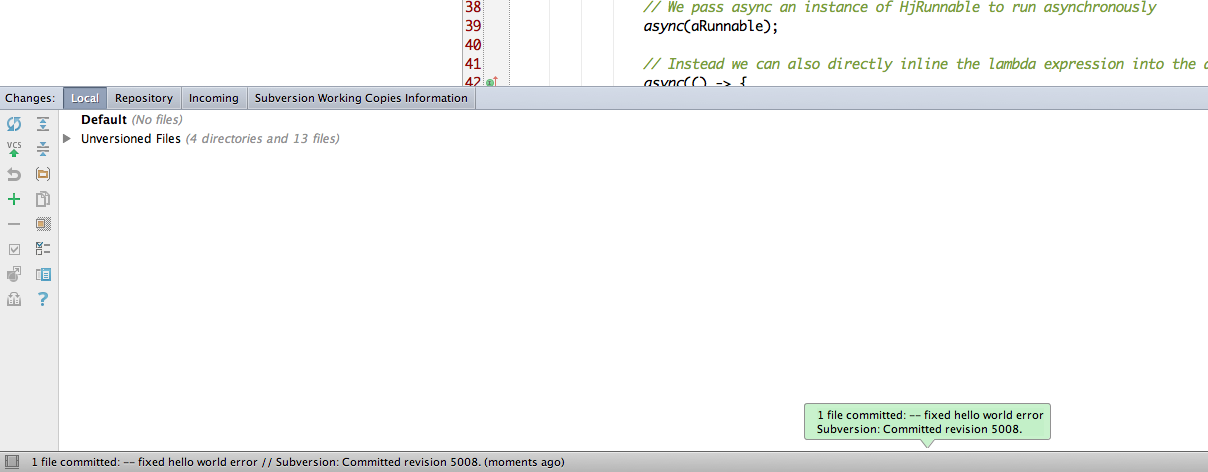
- Step 14: Confirm that you see the successfully committed message to ensure that your changes have been submitted to the repository.
- Step 15
- Step 16
- Step 17
- Step 18
- Step 19
- Step 20
- Step 21

- Step 22
- Step 23

- Step 24

- Step 25

Lorem Ipsum.