Please use one of the following microphones depending on its availability:
- Sony lavalier microphone (#1 choince)
- Azden 305/310LT UHF On Camera Body Pack System
- Azden wireless microphone copy 1 or copy 2,
- external shotgun microphone in the checkout package can be used at the same time as a backup mic recording to a separate audio channel.
Audio set-up:
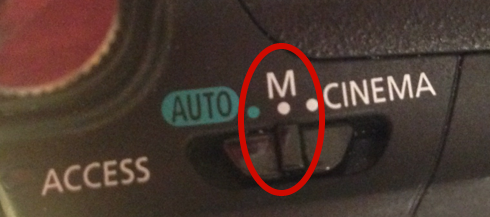
- Be sure to switch shooting mode to Manual. The switch is located on the top right hand side of the camera body right above the record/pause button. (Note: In Auto mode, you won't be able to display the audio input level on the LCD screen.)
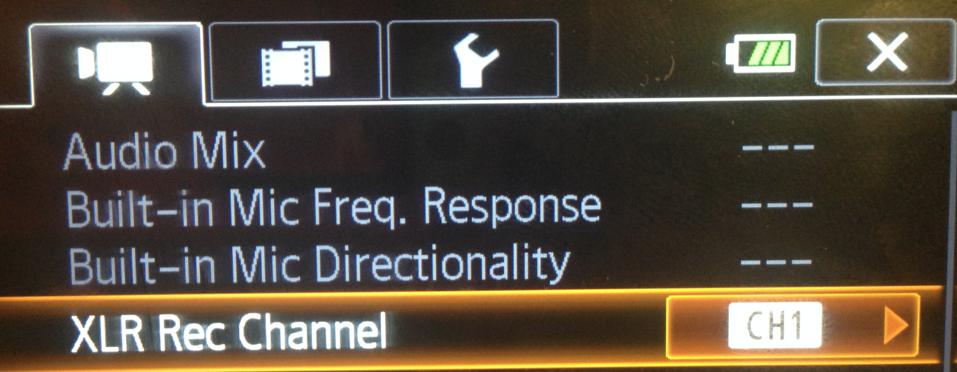
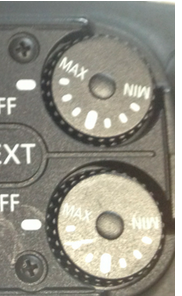
- On the LCD screen, press FUNC. > MENU, under the recording tab (first tab) scroll down to the bottom when you see XLR Rec Channel, be sure to set the channel to CH1. This way, an External Mic plugged in Chanel 1 will record to Channel 1 and an External Mic plugged in Channel 2 will record to Channel 2.)
- Make sure the external shotgun microphone that comes with the checkout package is connected to CH1; then connect any of above recommended microphone to CH2.
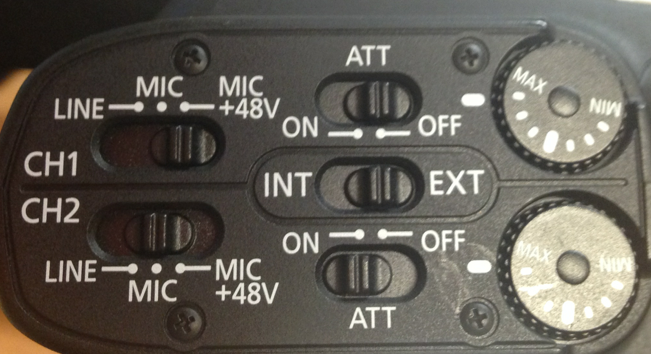
- Refer to the following screenshot for the audio set up and be sure CH1 is set to MIC+48V; CH2 is set to MIC, Mic source is set to EXT instead of INT.
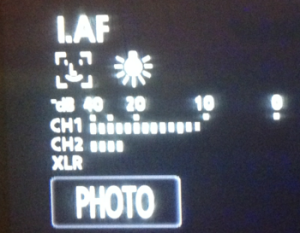
- Monitor the audio input level on the LCD screen, if everything is connected properly in above steps, you should see audio come from both channels: CH1 should show the level from external shotgun mic, CH2 should show the audio level from wireless microphone. Then use the audio level control to adjust the audio level and make sure the audio meter falls between -20db and -10db.
- Record a snippet for testing purpose, playback and make sure you are getting good audible audio.