- The updating process begins when the Metadata/Copy Cataloging Unit Team Lead sends a list of terms (usually as a Word document) newly added to the local Historical Images thesaurus spreadsheet.
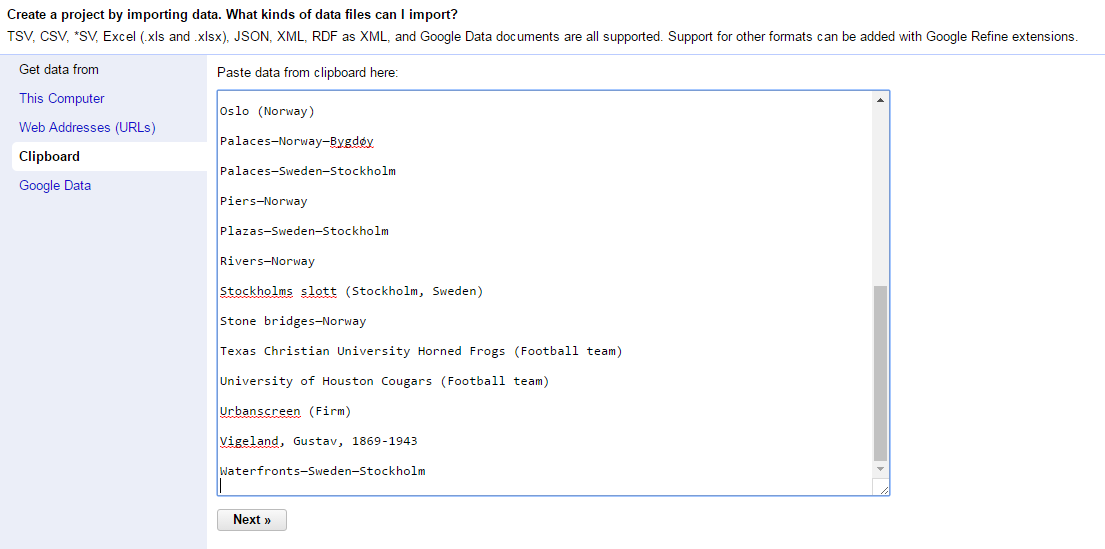
- Start OpenRefine and navigate to Create Project > Clipboard. Paste in the new terms. Click Next.
- Use the below parameters and click Create Project.

Microsoft Word routinely changes double-dashes (–) into the longer emdash (—). These need to be replaced with the correct double-dashes.
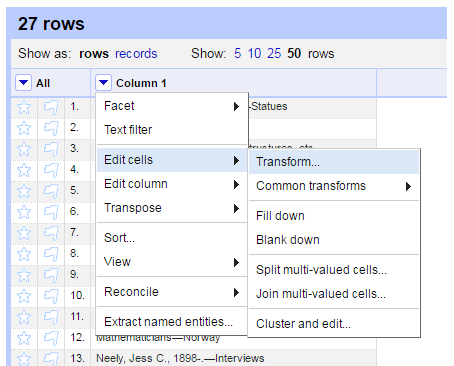
This change can be accomplished by navigating to Edit Cells > Transform:
In the Transform window, using the following expression:
value.replace('—','--')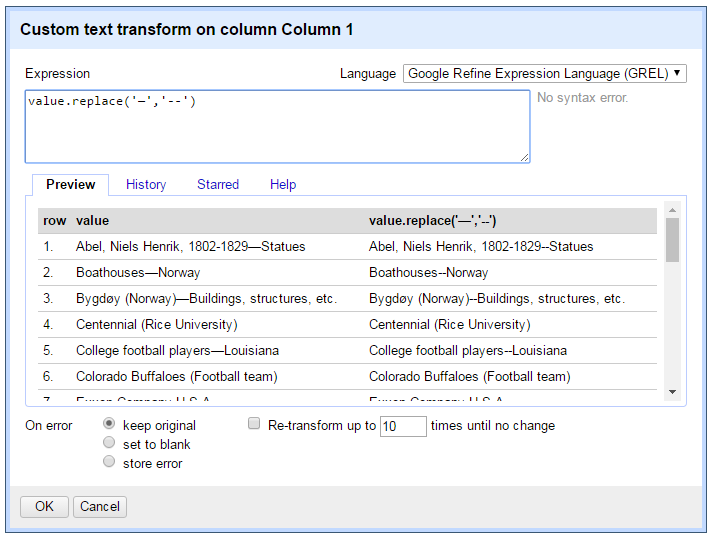
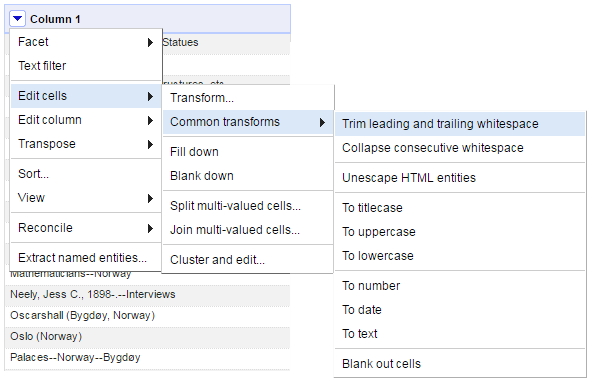
Click okay. All emdashes should now be replaced.- Return to Edit Cells to trim the whitespace in the new terms:
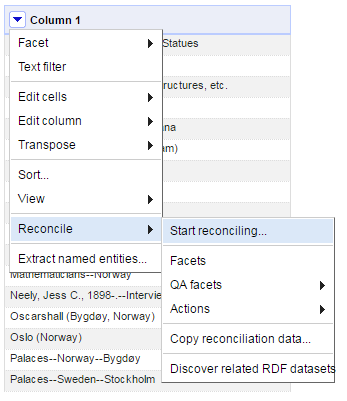
- Navigate to Reconcile > Start Reconciling:
If you haven't already, add the LC Reconciliation Service. In the Reconciliation window, click on Add Standard Service and enter the following URL: http://lc-reconcile.cmh2166.webfactional.com/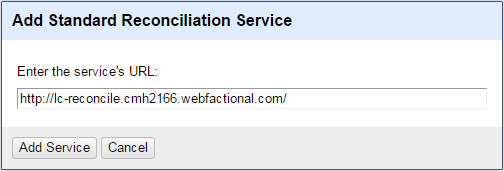
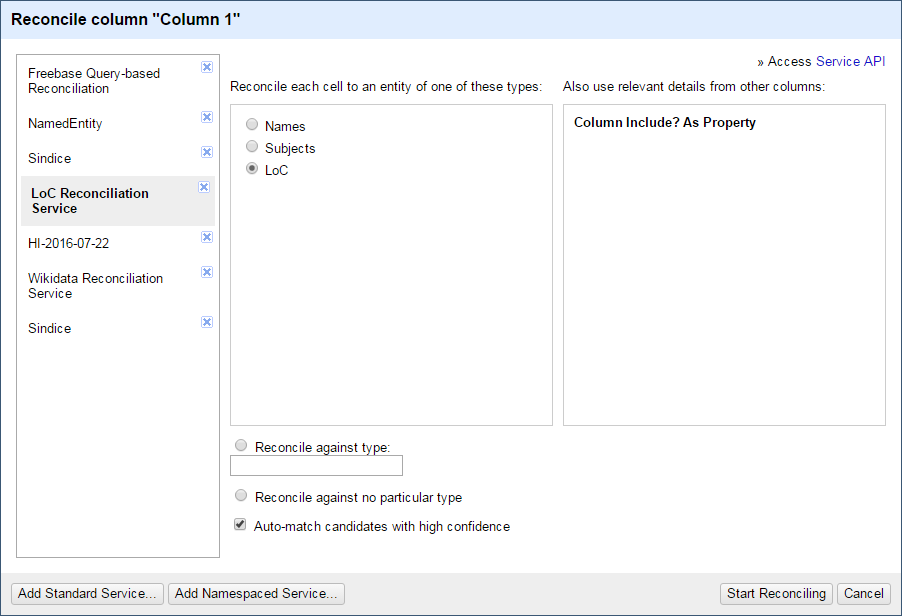
- Click on "LoC Reconciliation Service", make sure LoC is selected as the Type to match against, and click Start Reconciling.
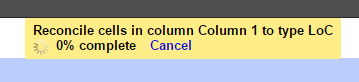
- Wait until the Reconciliation process is finished running.
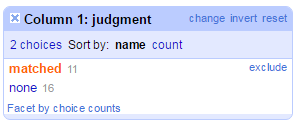
- The Reconciliation results will show up in a facet on the left hand side of the screen. Click on the Matched headings to see only those in the main window.
- Navigate to Edit Column > Add Column Based On This Column, and create a new column that extracts the LC URI from the Reconciliation results. Use this Expression:
cell.recon.match.id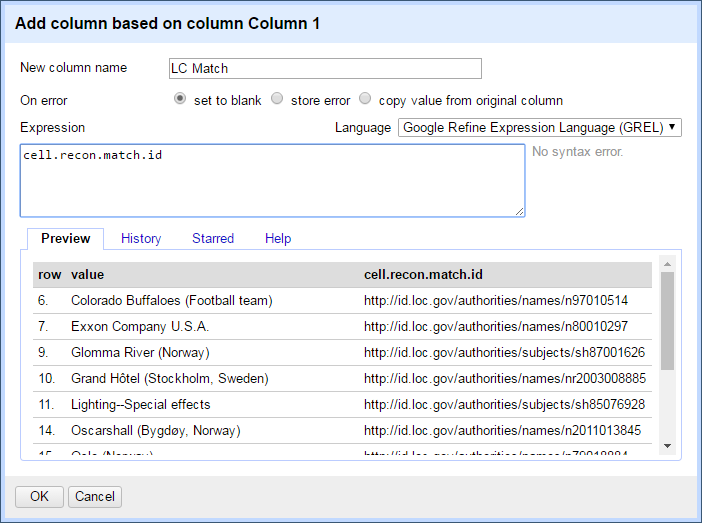
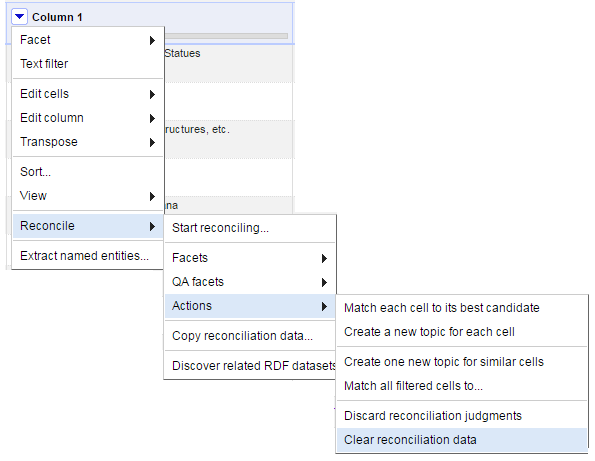
- Once the URIs are added in a new column, close the Judgement facets from the Reconciliation process and clear the Reconciliation data. Navigate to: Reconcile > Actions > Clear Reconciliation Data.
- Export your reconciled data to a new TSV file using the Export button at the top right hand part of the screen:

- Open the working spreadsheet that generates RDF entities – you will find it on the Projects server at: \\Projects\AuthorityWork\RDF\HI\HI-Thesaurus-Updated.xlsx
- Load your new terms and URIs from the TSV file into the spreadsheet. Place the new term(s) in column A and the matched URI into column D.
- The FORMULAS tab contains pre-written Excel FORMULAS to help you generate the RDF elements:
- Increment the URI number (for colum B),
- Generate URI (column C), and
- Generate RDF elements, with or without LC URIs from column D.
Simply insert the correct starting row for each. Always be sure that any formulas are turned into VALUES once generated.
- Once the RDF entities in column G are generated and stored as VALUES, copy the new terms and paste them in the RDF file can be found at \\Projects\AuthorityWork\RDF\HI\HI.rdf
Paste the new terms just before the STATUS declaration at the end of the file. The pasted-in entities will look different than the ones that already exist in the RDF file: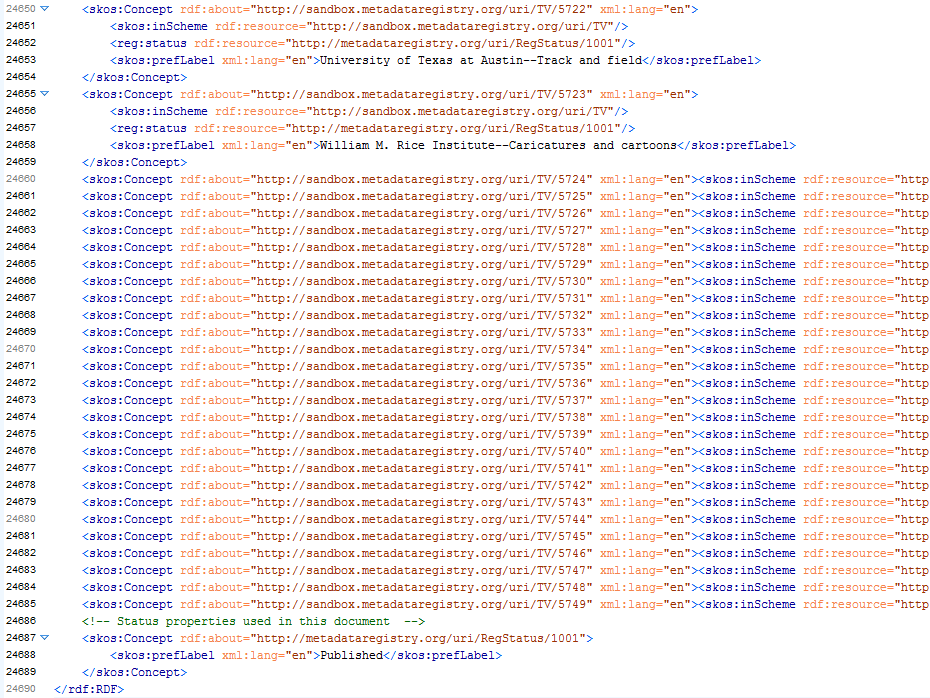
To fix this, click on the Format and Indent button in the toolbar:
- Your code should be indented and beautiful. Save the RDF file.
- Finish by emailing the Metadata/Copy Cataloging Unit Team Lead to say the RDF file is updated.
Page History
Overview
Content Tools